App Store Submission
A guide to making your App Store submission process as easy as possible.
In-app purchases can be tricky to get right and it is easy to get frustrated when your app gets rejected by the App Store review team. In this guide, we step through some of the key issues related to in-app purchases in the App Store review process and how you can address them with the Nami platform.
Submit all products for review
Apple must review all in-app purchase products that you plan to use in your app. The Nami platform allows you to easily change purchase products and to use different purchase products in a different Paywall or Campaign, so you may have multiple products you'd like to use that do not all show up in a single paywall.
We'll step through an approach to setting all of these up below.
Nami Best Practice
We recommend creating a paywall and setting it live in your app specifically for the app review process.
Create a review paywall
Creating a paywall that you use specifically for the review process is an easy way to make sure you haven't missed anything the app review team might be looking for.
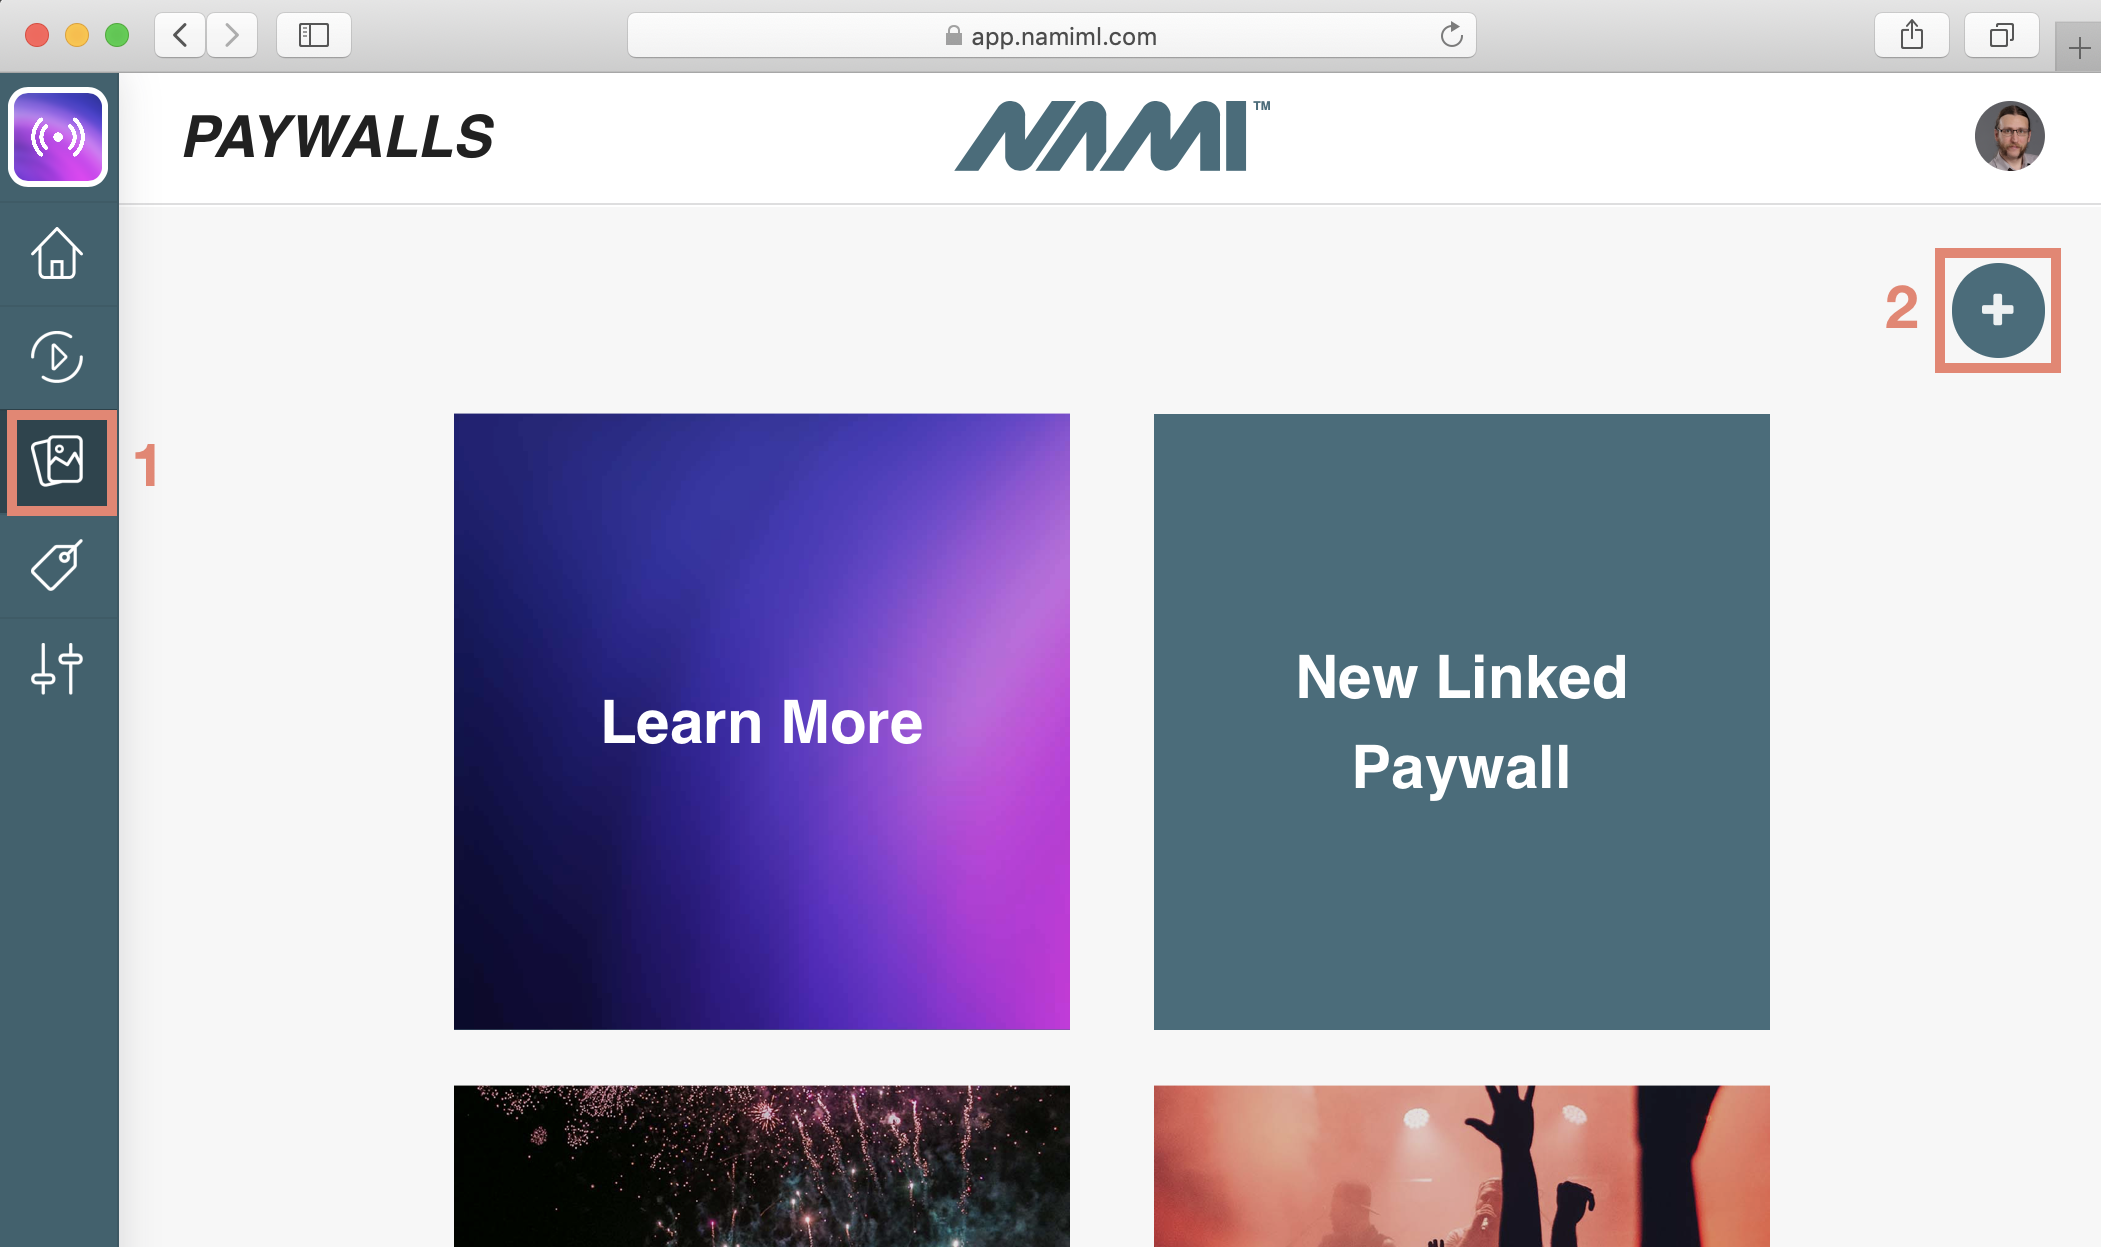
Let's walk through how to create a new review paywall in the Control Center. First, start by navigating to the Paywall screen and clicking the + button to create a new paywall.
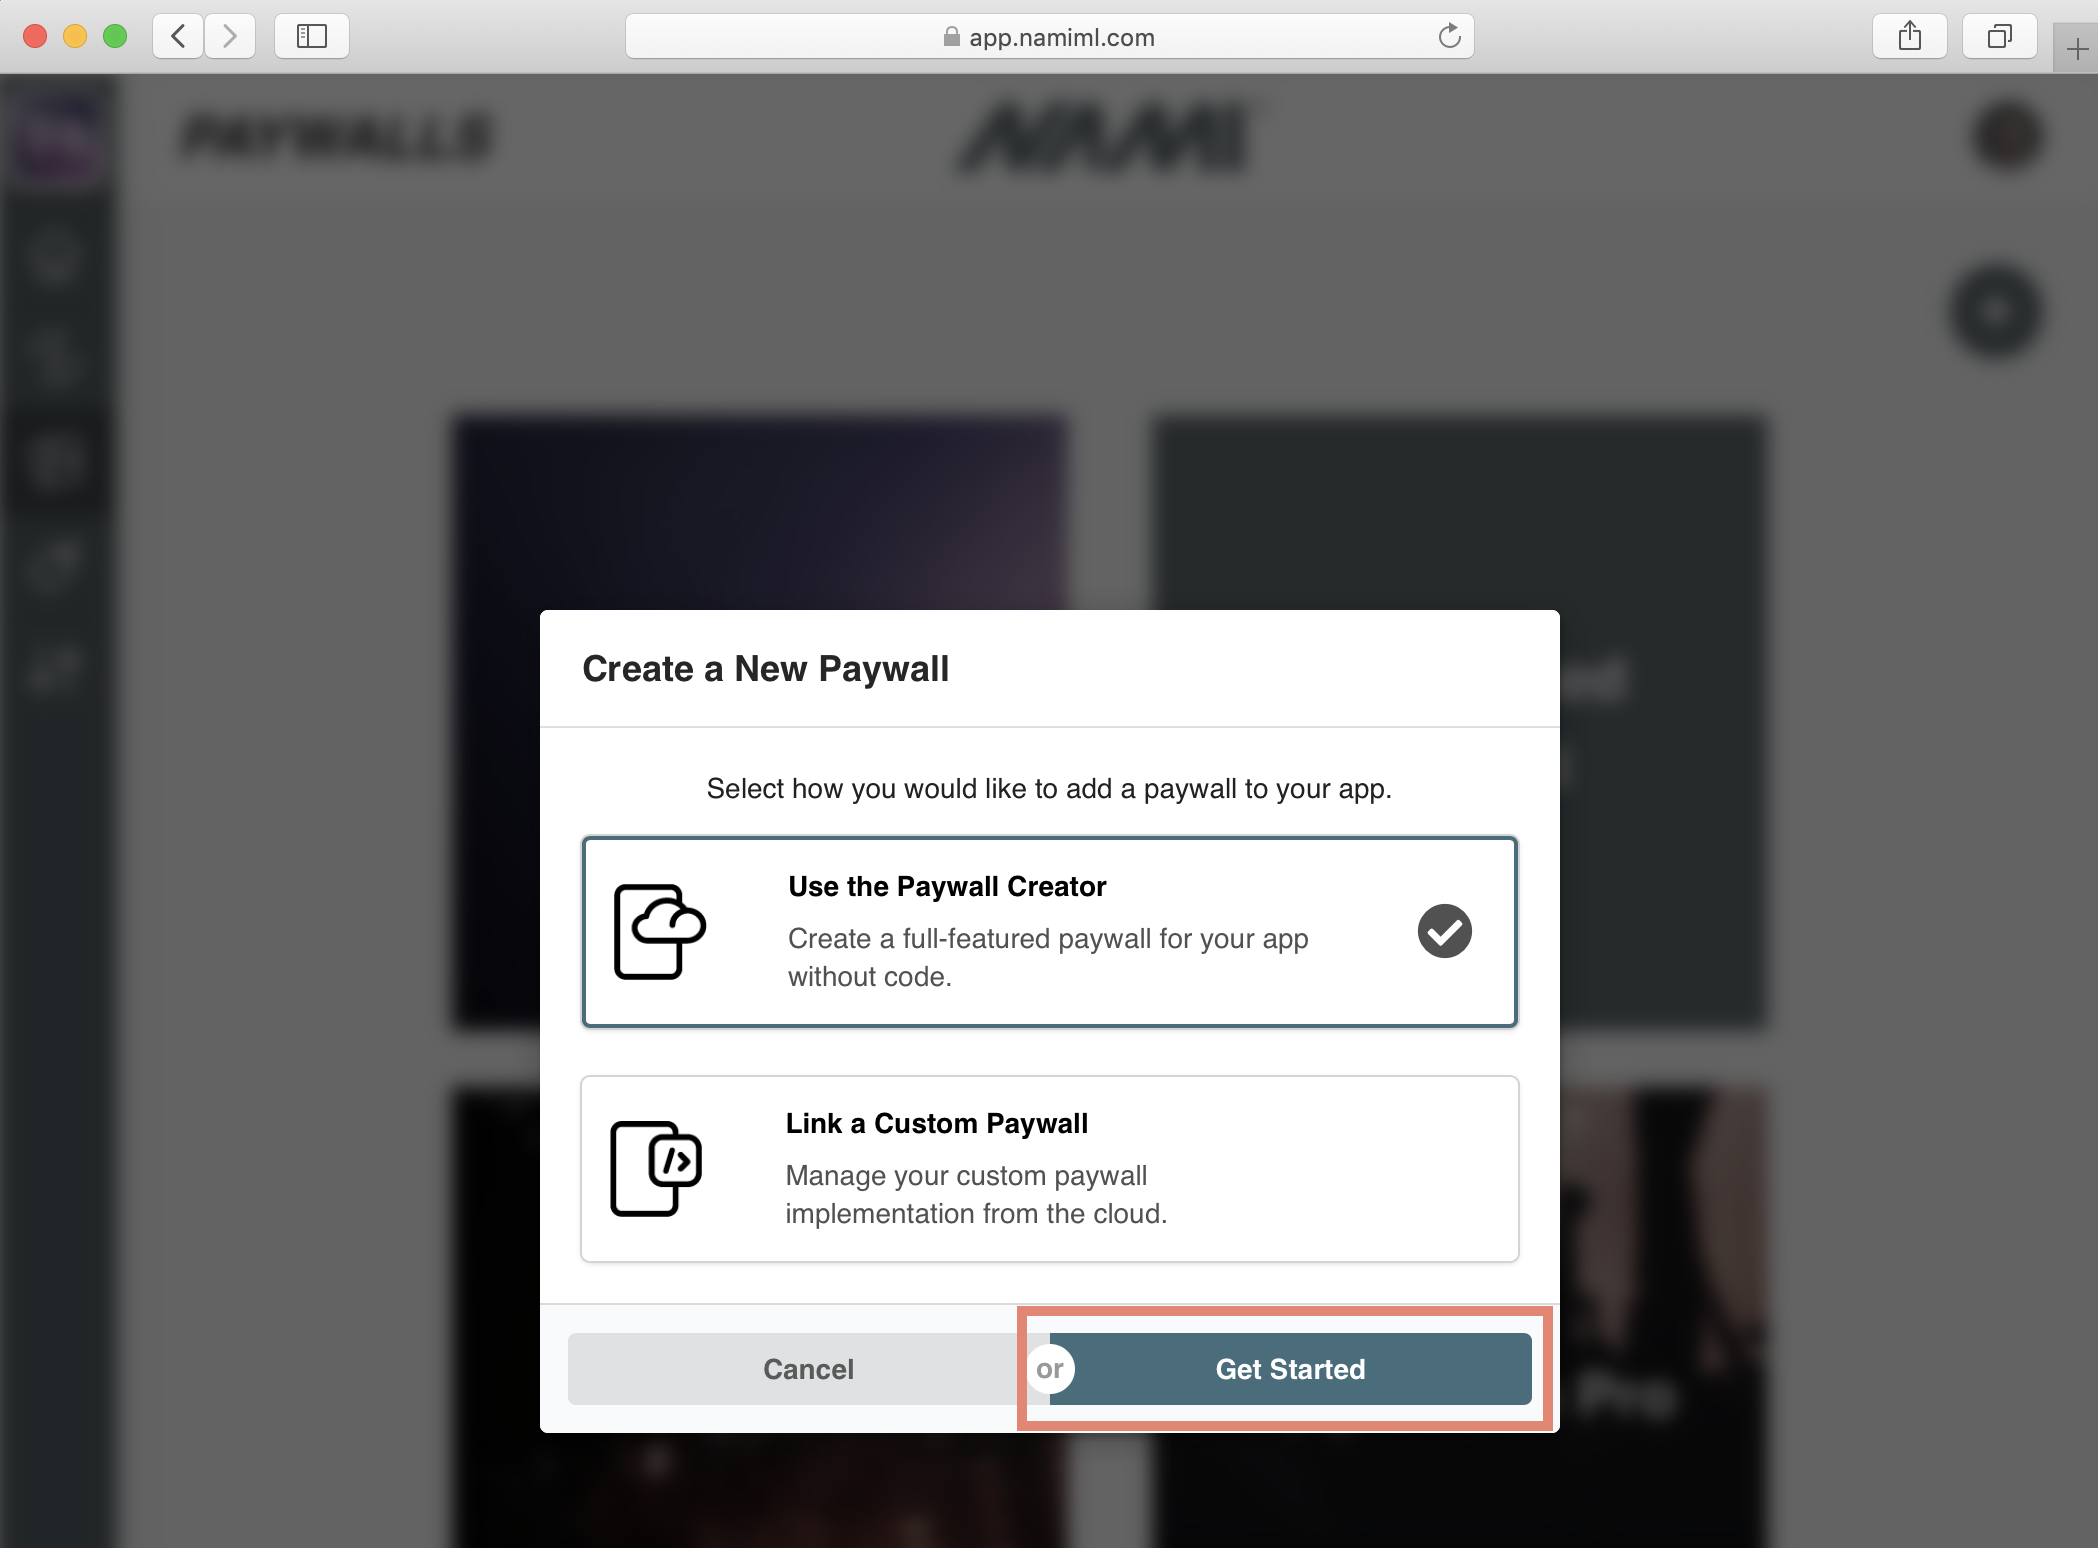
Now let's make a new cloud-based paywall with our Paywall Creator. Select the Paywall Creator option and then click Get Started.
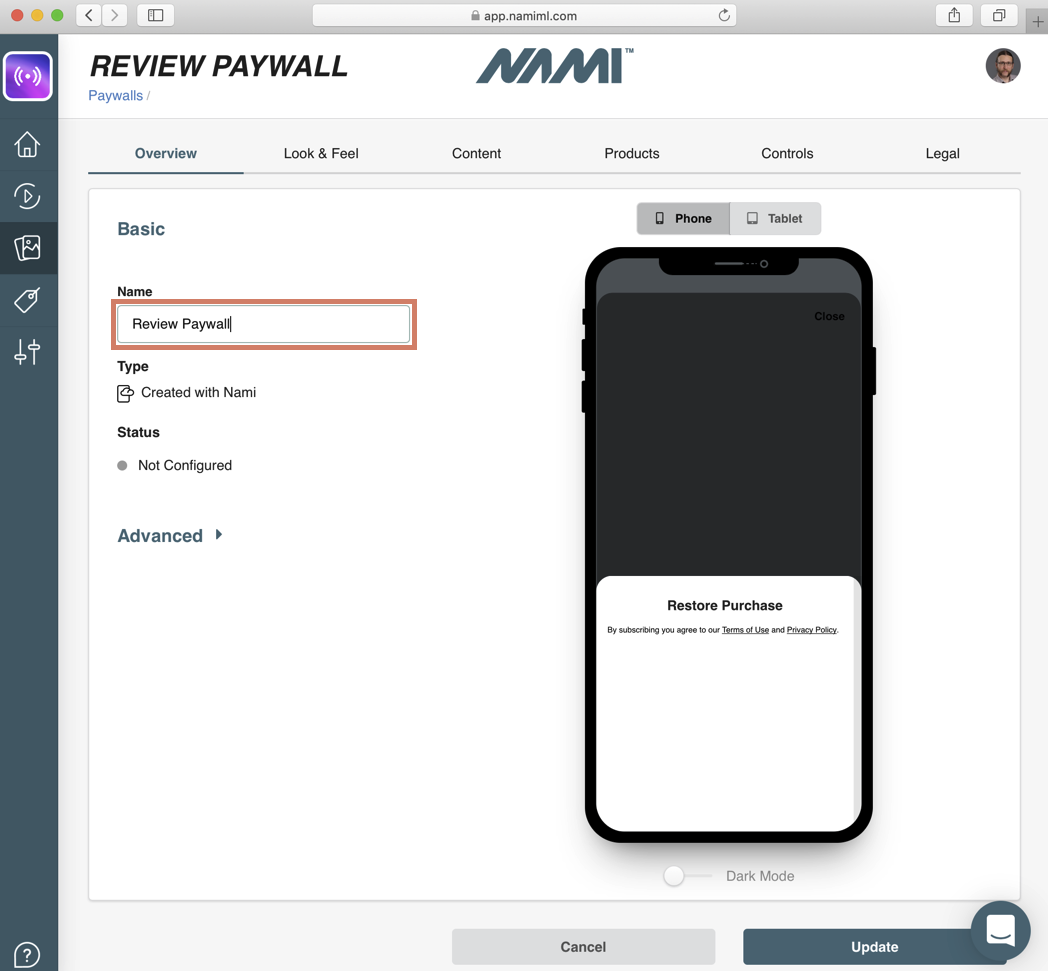
Let's give the paywall a simple name like Review Paywall to help us remember why we created it.
Choose one of your existing paywalls and replicate the setup, including:
- the background images on the Look & Feel tab
- the title and body text on the Content tab
- any purchase terms on the Legal tab
If you haven't created a paywall yet, take a look at our guide to creating a cloud-based paywall.
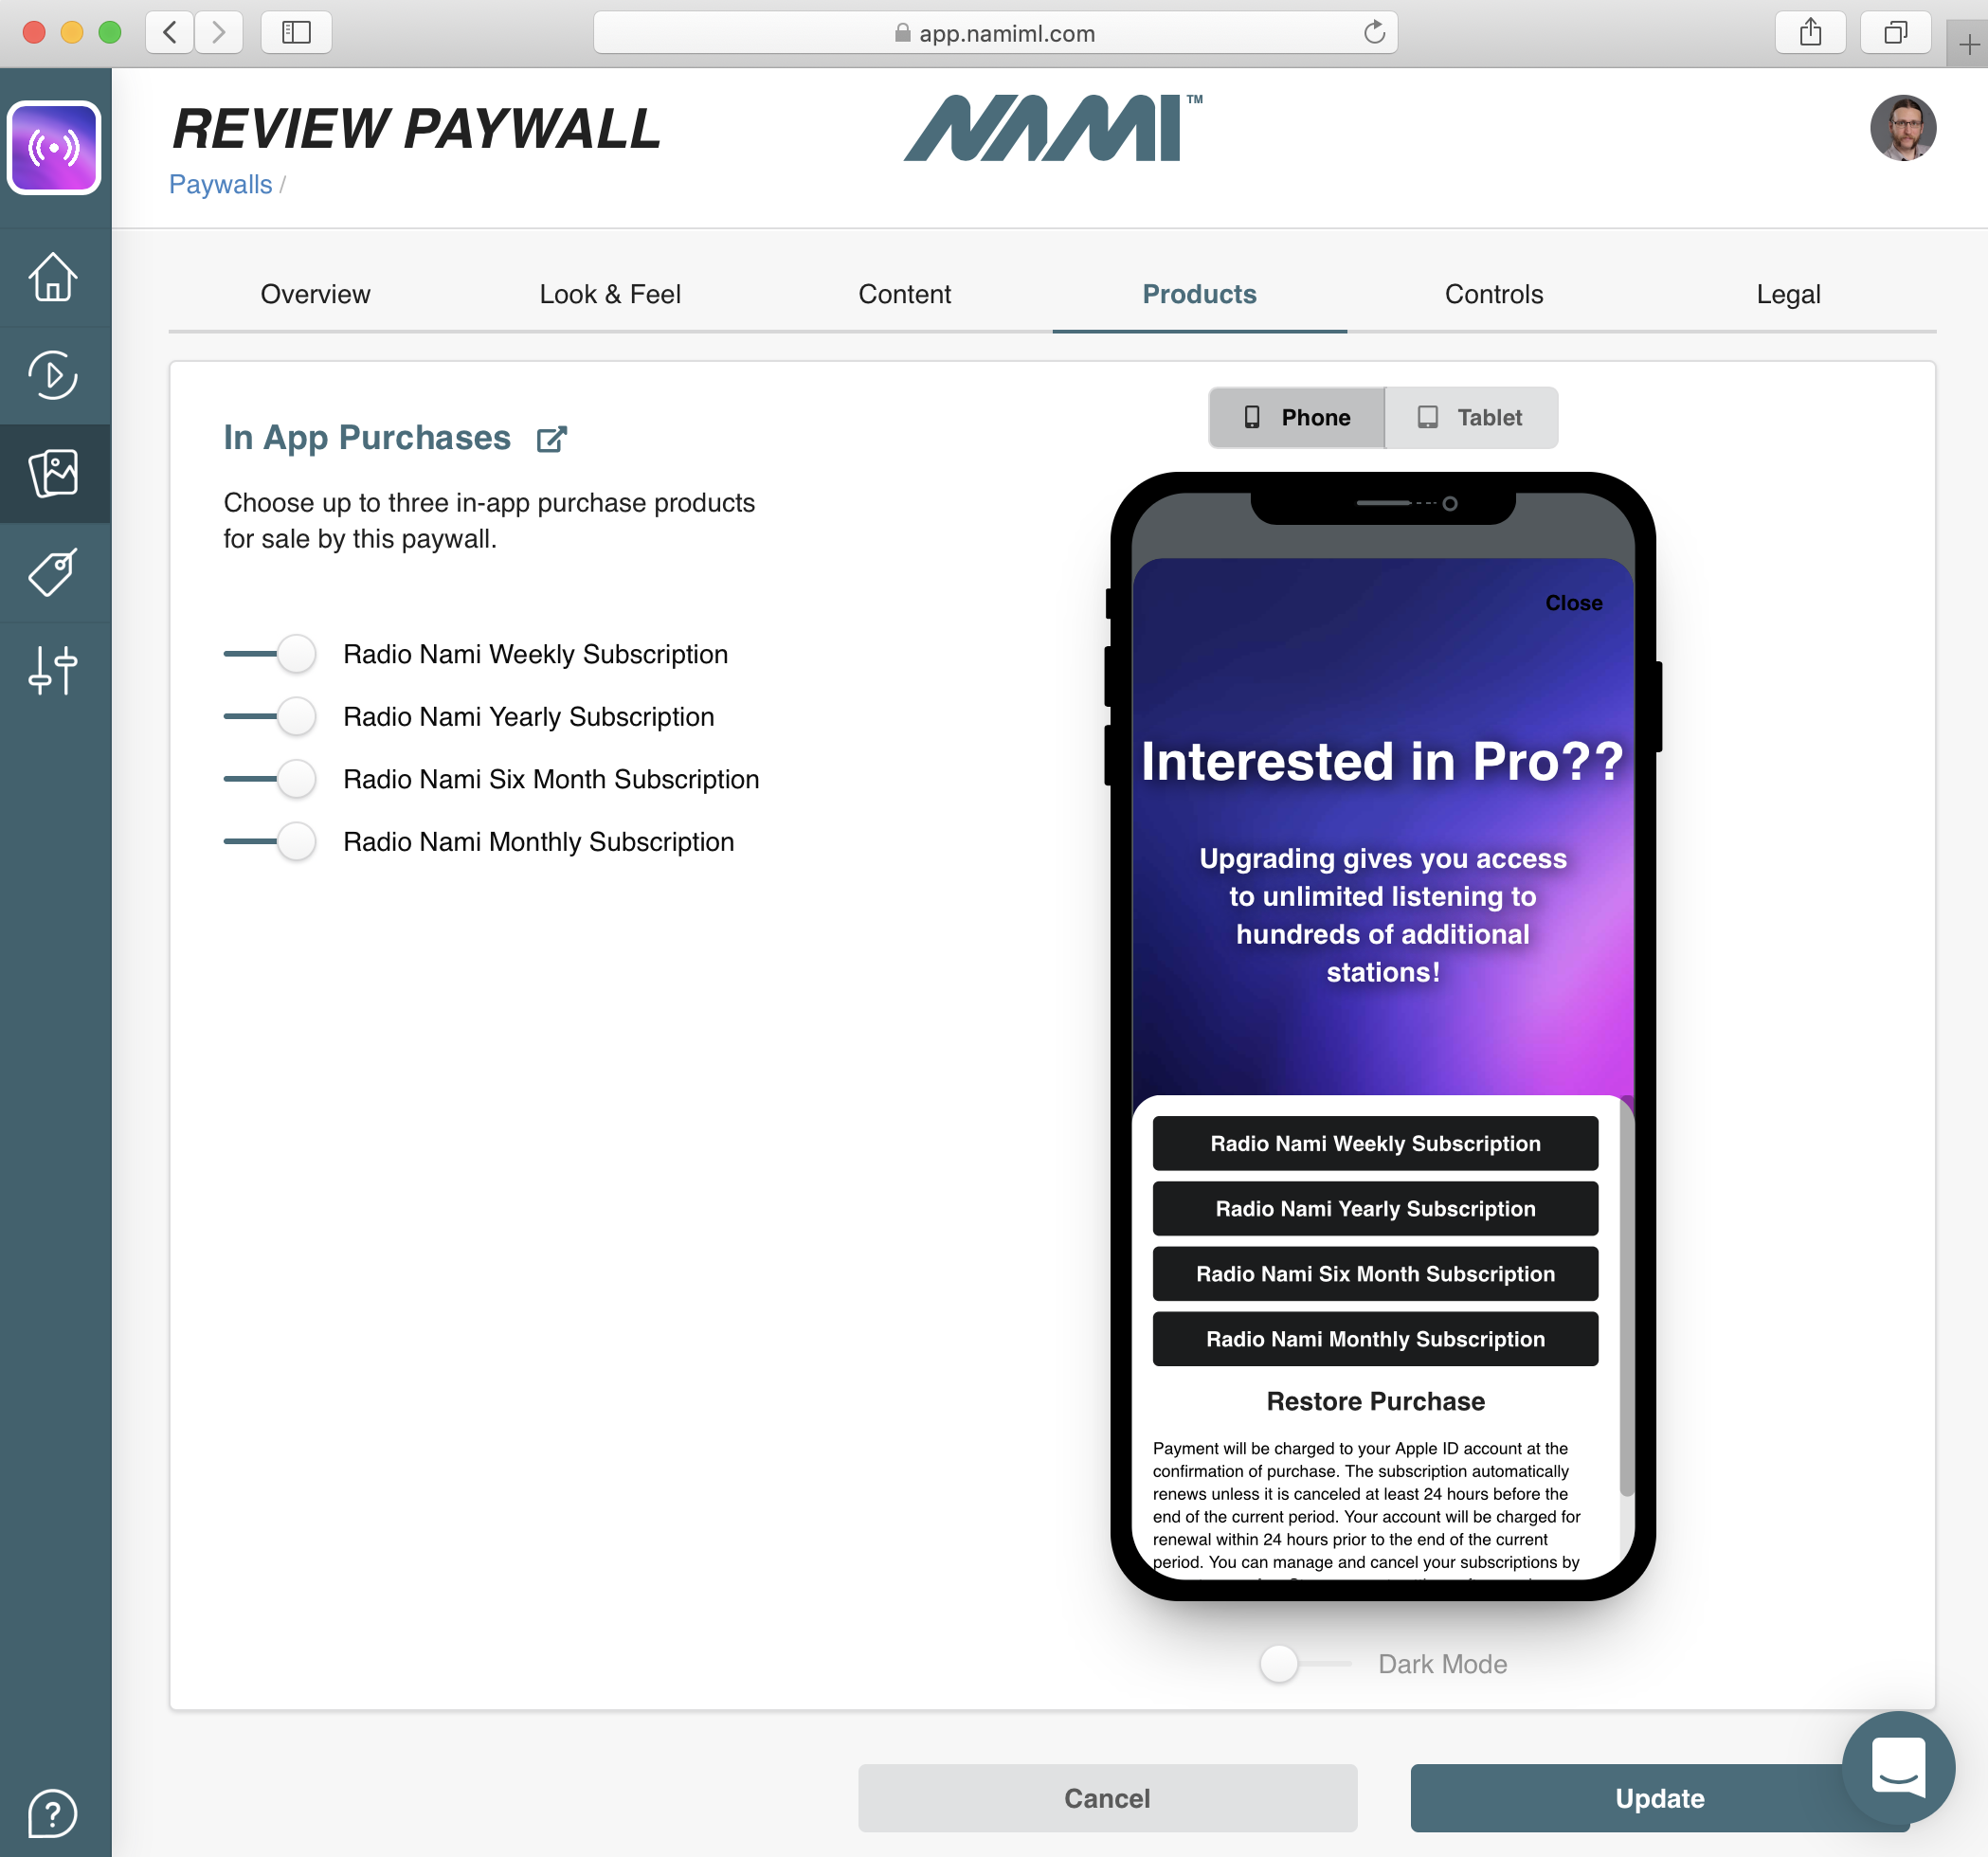
Now, on the products tab go ahead and add all the products you intend to use in your app. Click Update to save all your changes.
Apps with Nami live on the App Store
If your app is already running with Nami on the App Store, you'll need to use a paywall for review that also works with your app running in production.
Make sure you configure it so it will work for both situations!
Make a review campaign
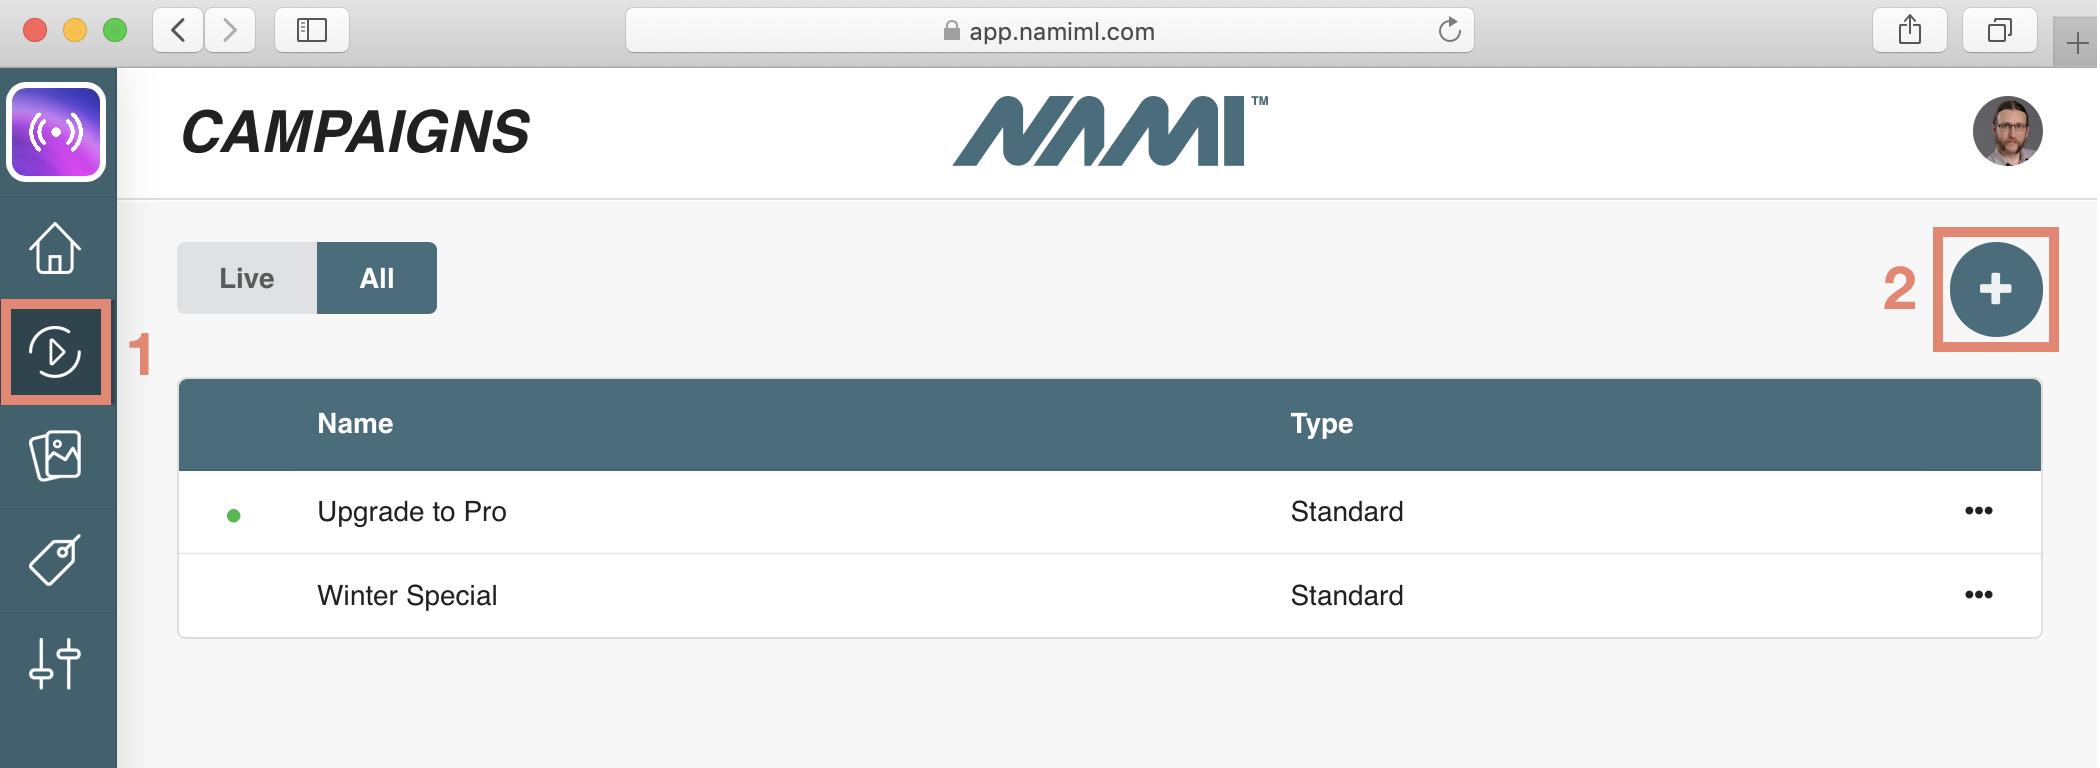
Now that you are all set with your review paywall, let's go add it to a campaign for the review process. Click on the Campaign icon on the main navigation and then the + or Add Campaign button.
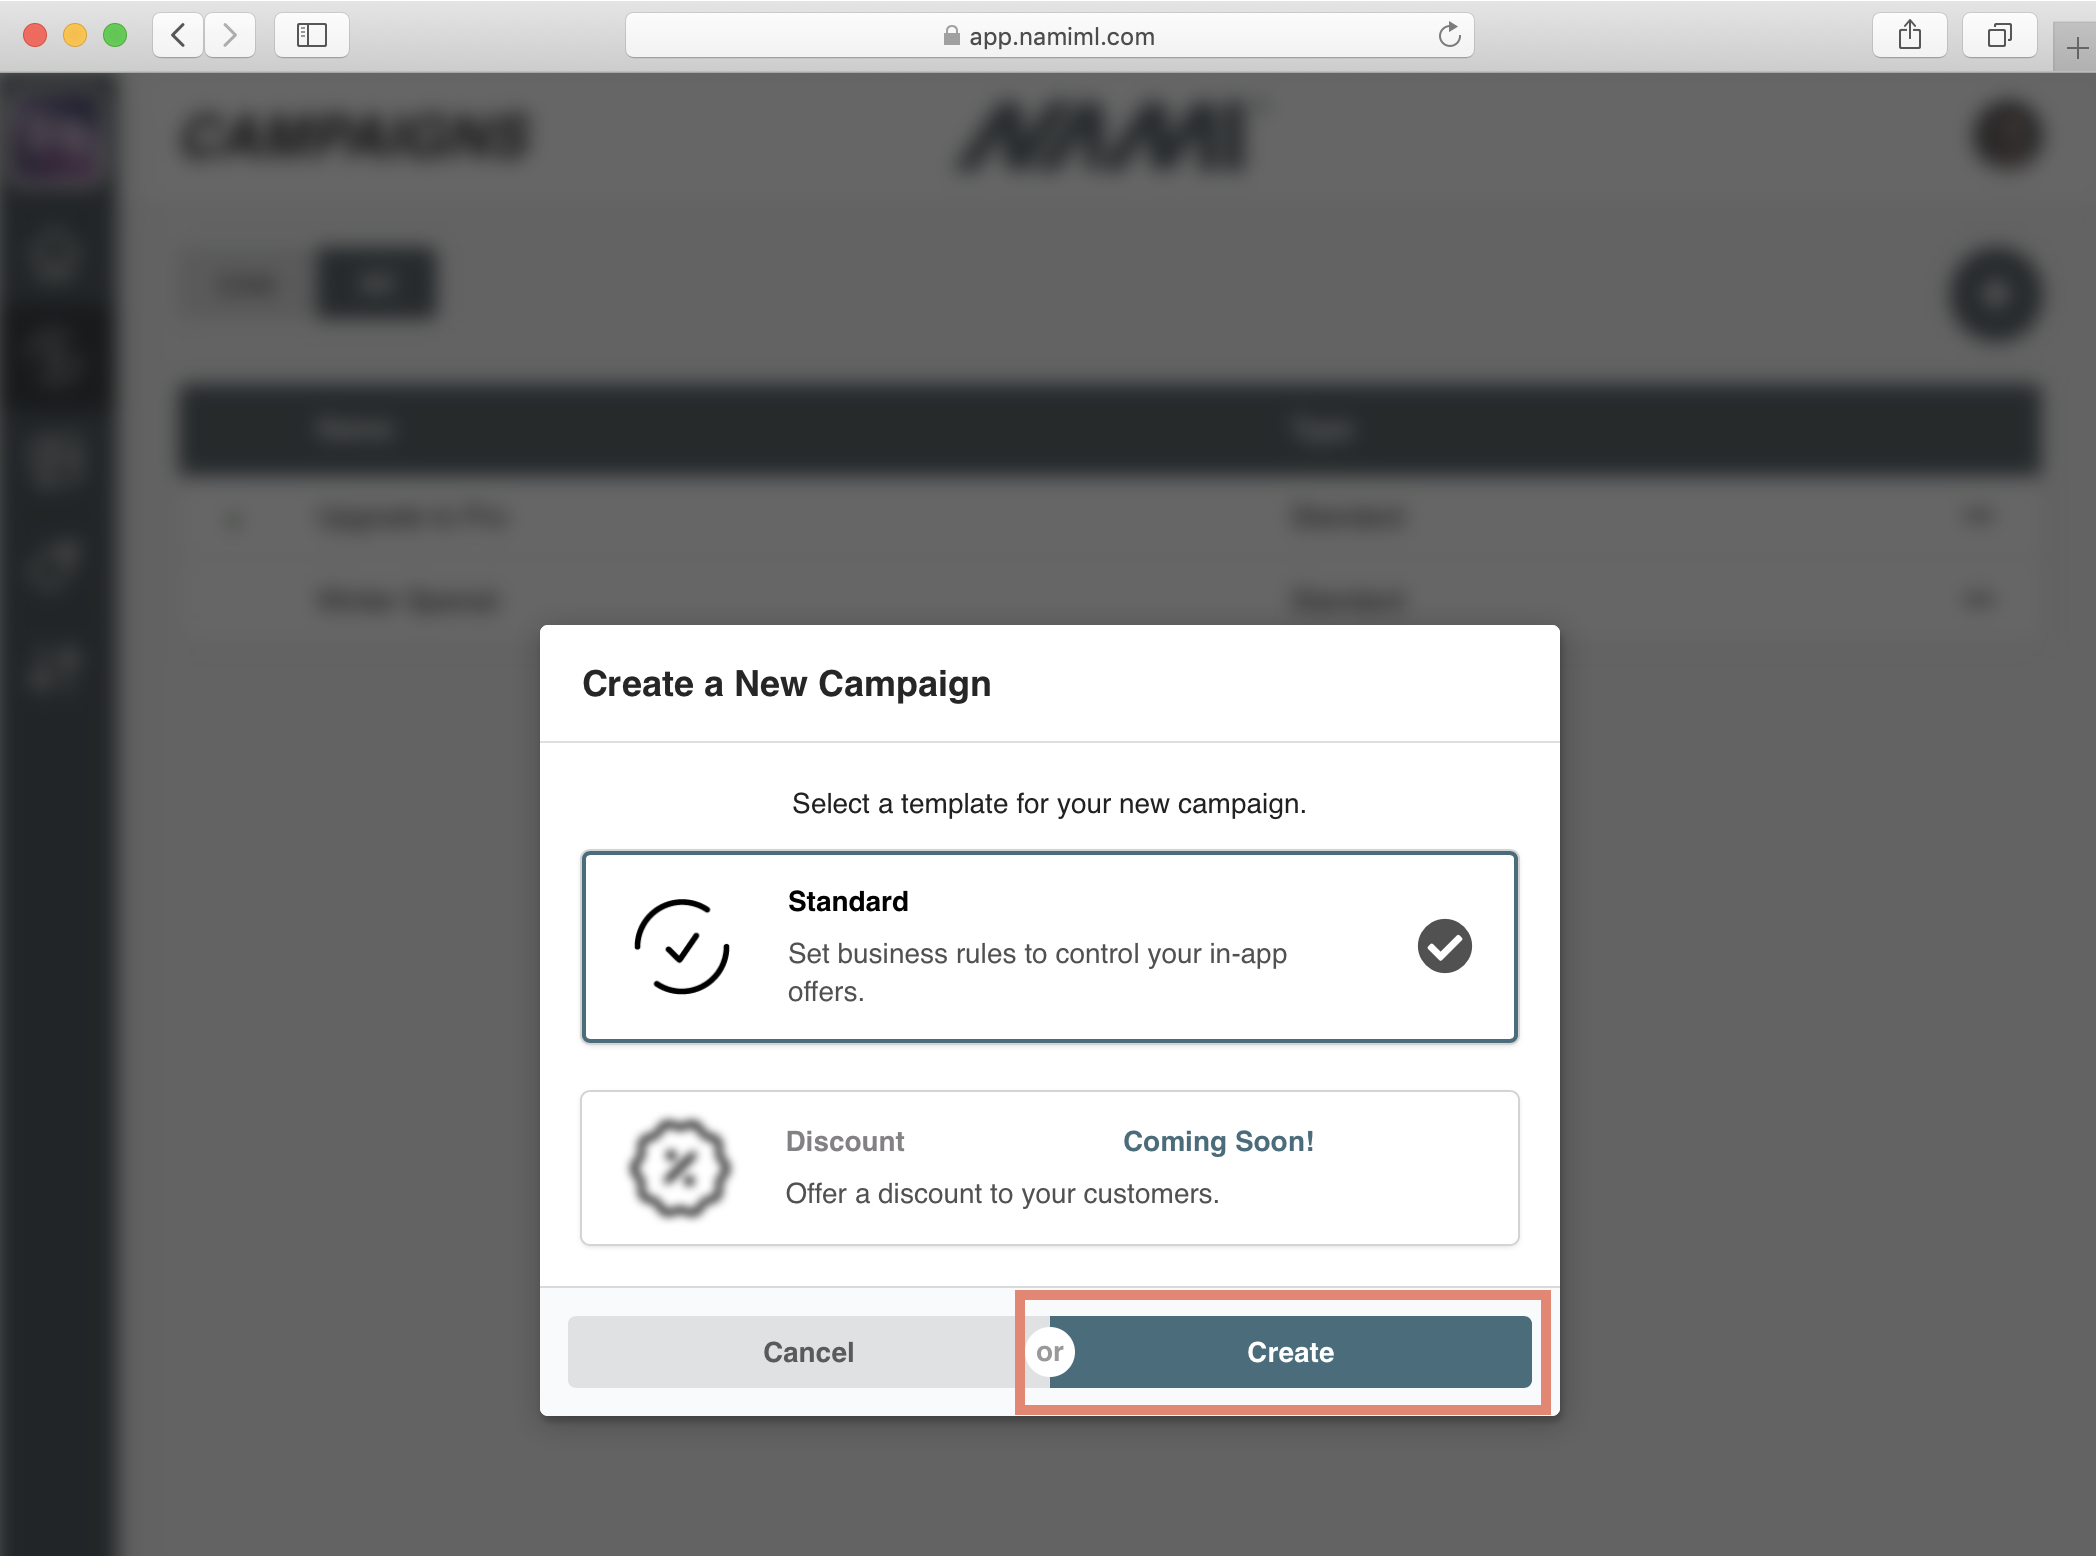
Select a Standard Campaign and click Create.
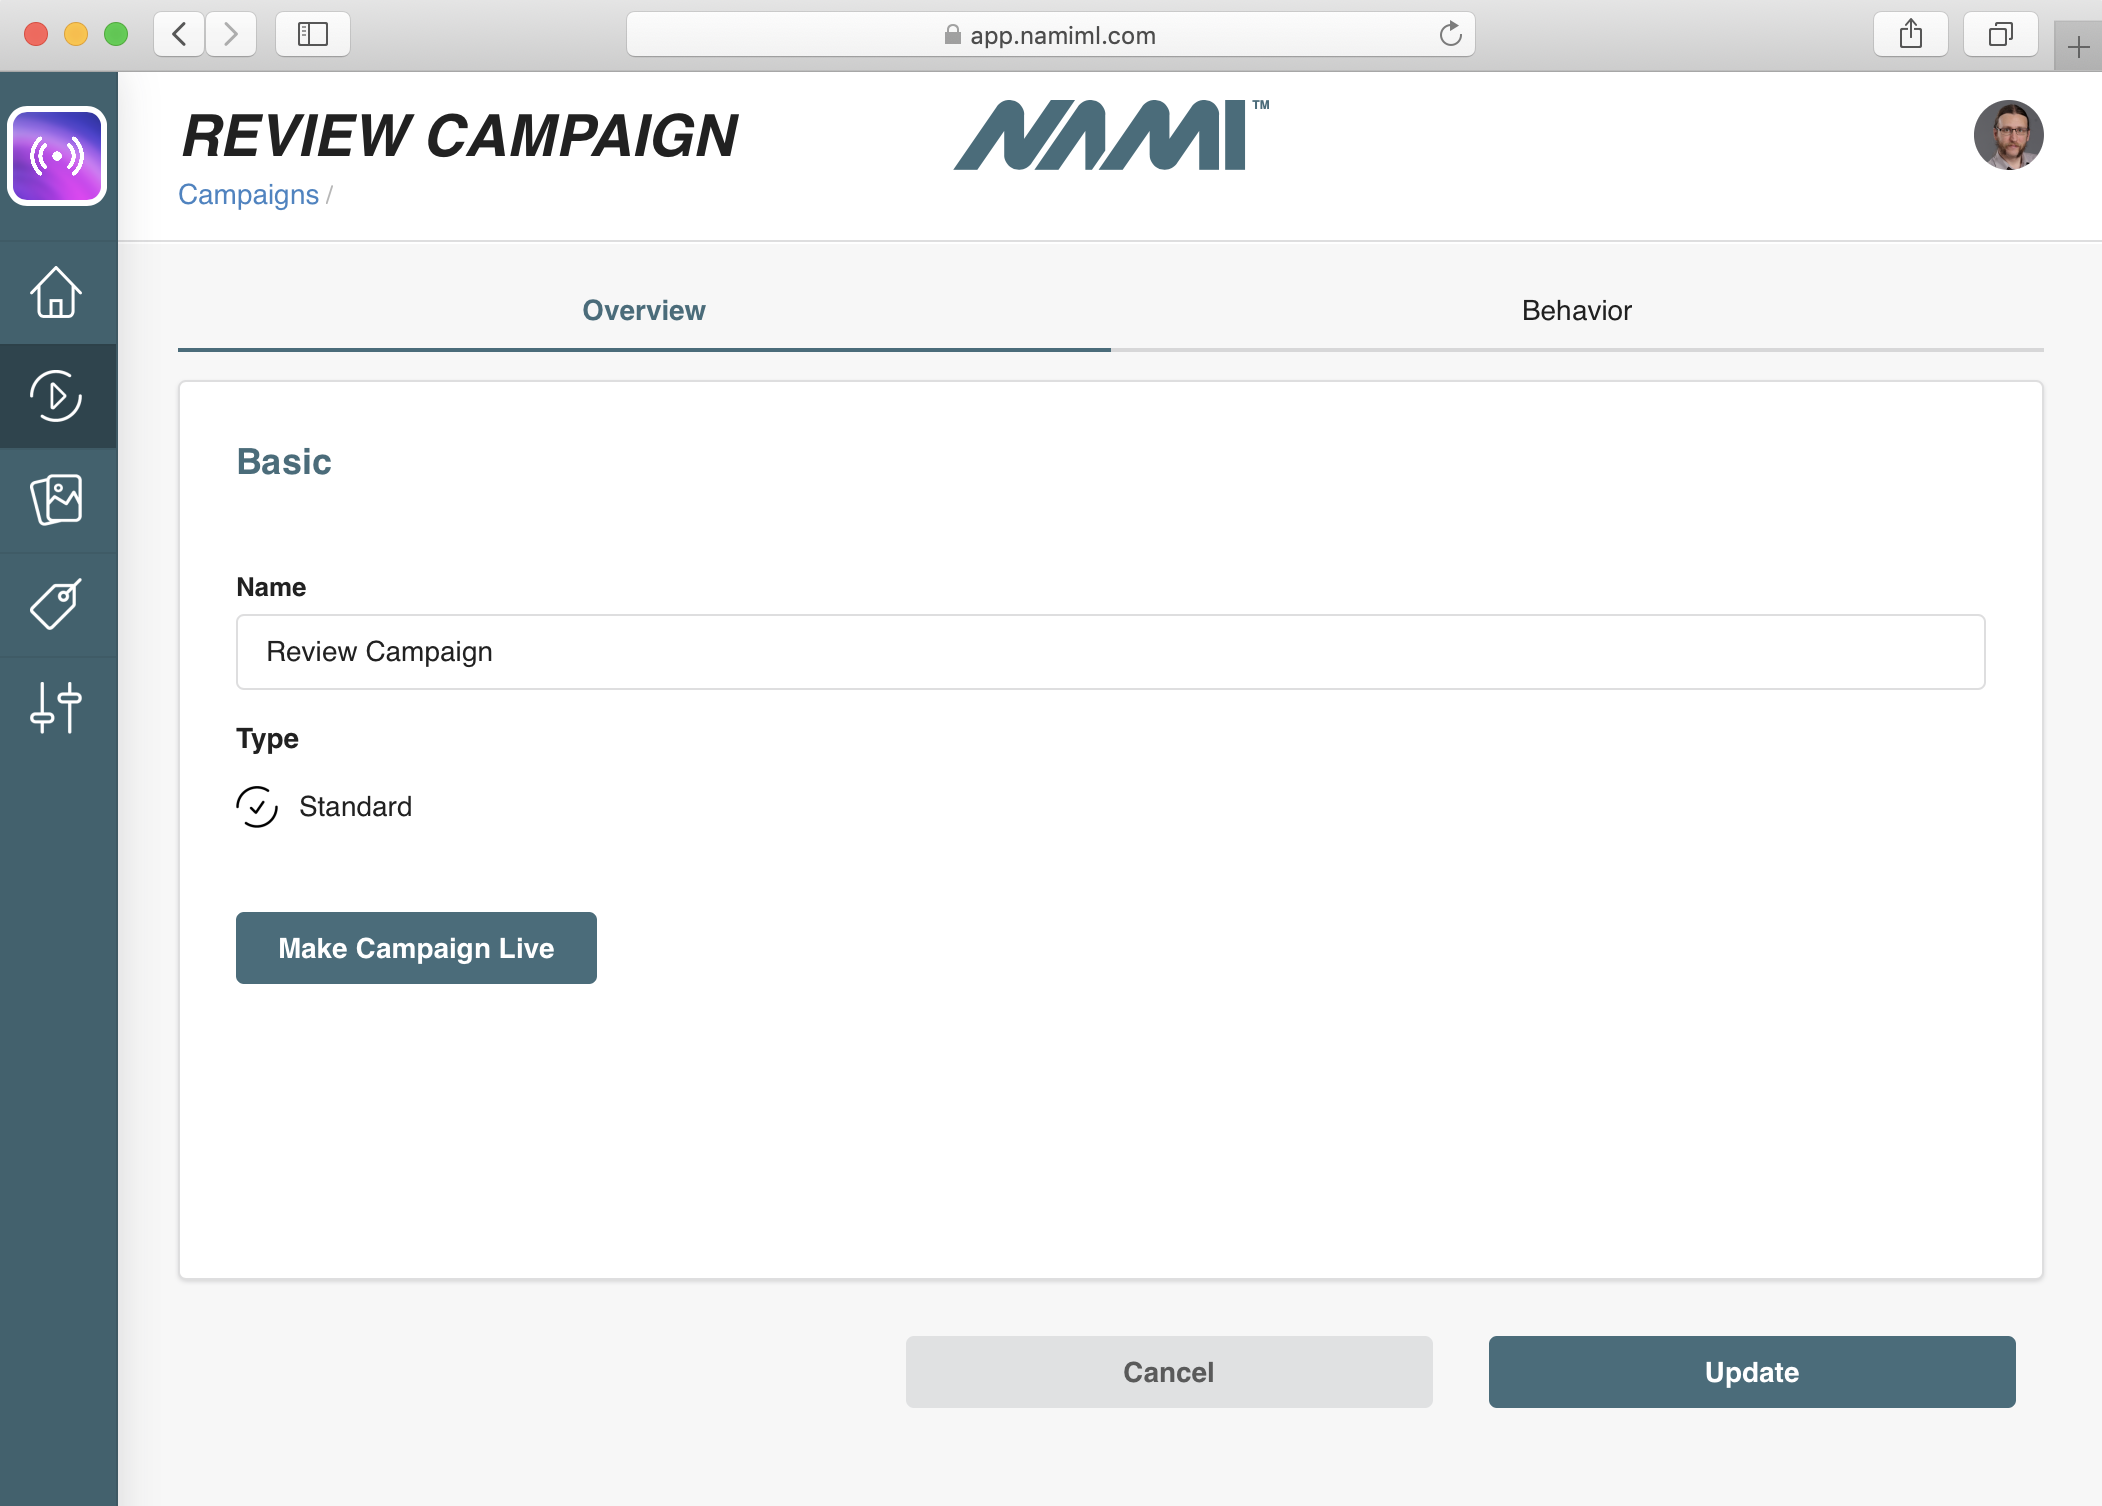
Let's again use an easy to remember name like Review Campaign.
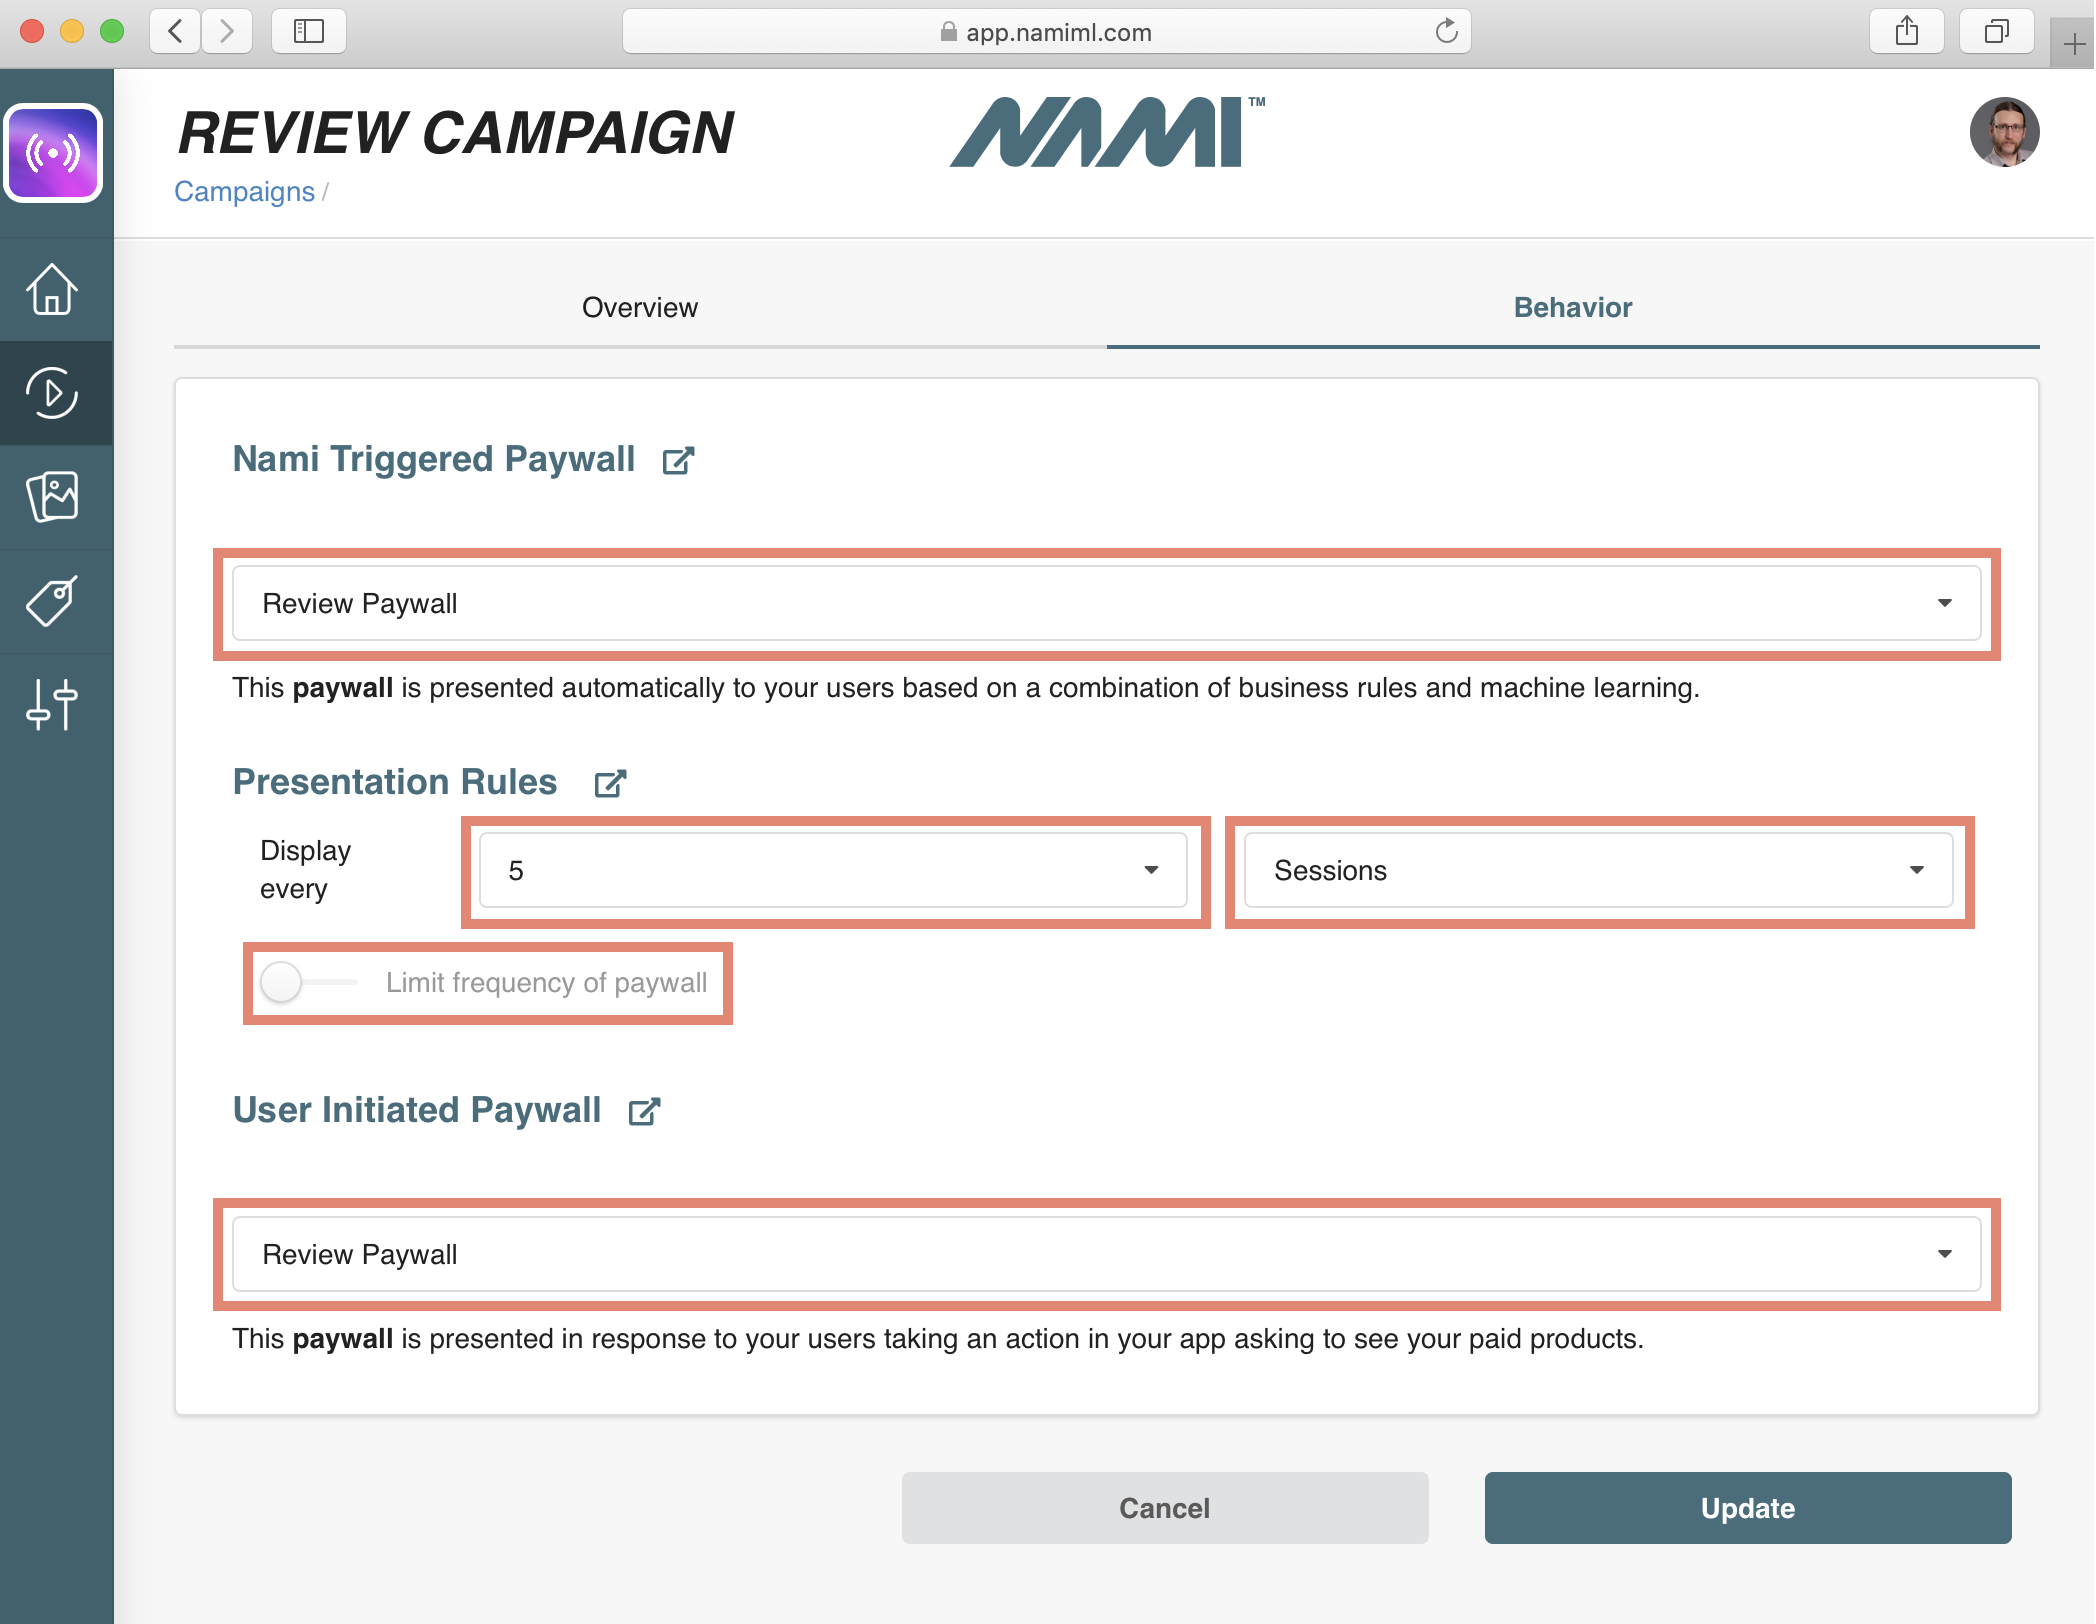
On the Behavior tab, let's add the Review Paywall we created in the previous section. Set it for both the Nami Triggered and User Initiated Paywall dropdowns.
Under the Presentation Rules for the Nami Triggered paywall, ensure the Limit frequency of paywall toggle is off, and set the paywall to present with similar rules to your primary campaign you plan to use in your app.
Save all your changes by clicking the Update button and then click the Make Campaign Live button on the Overview tab.
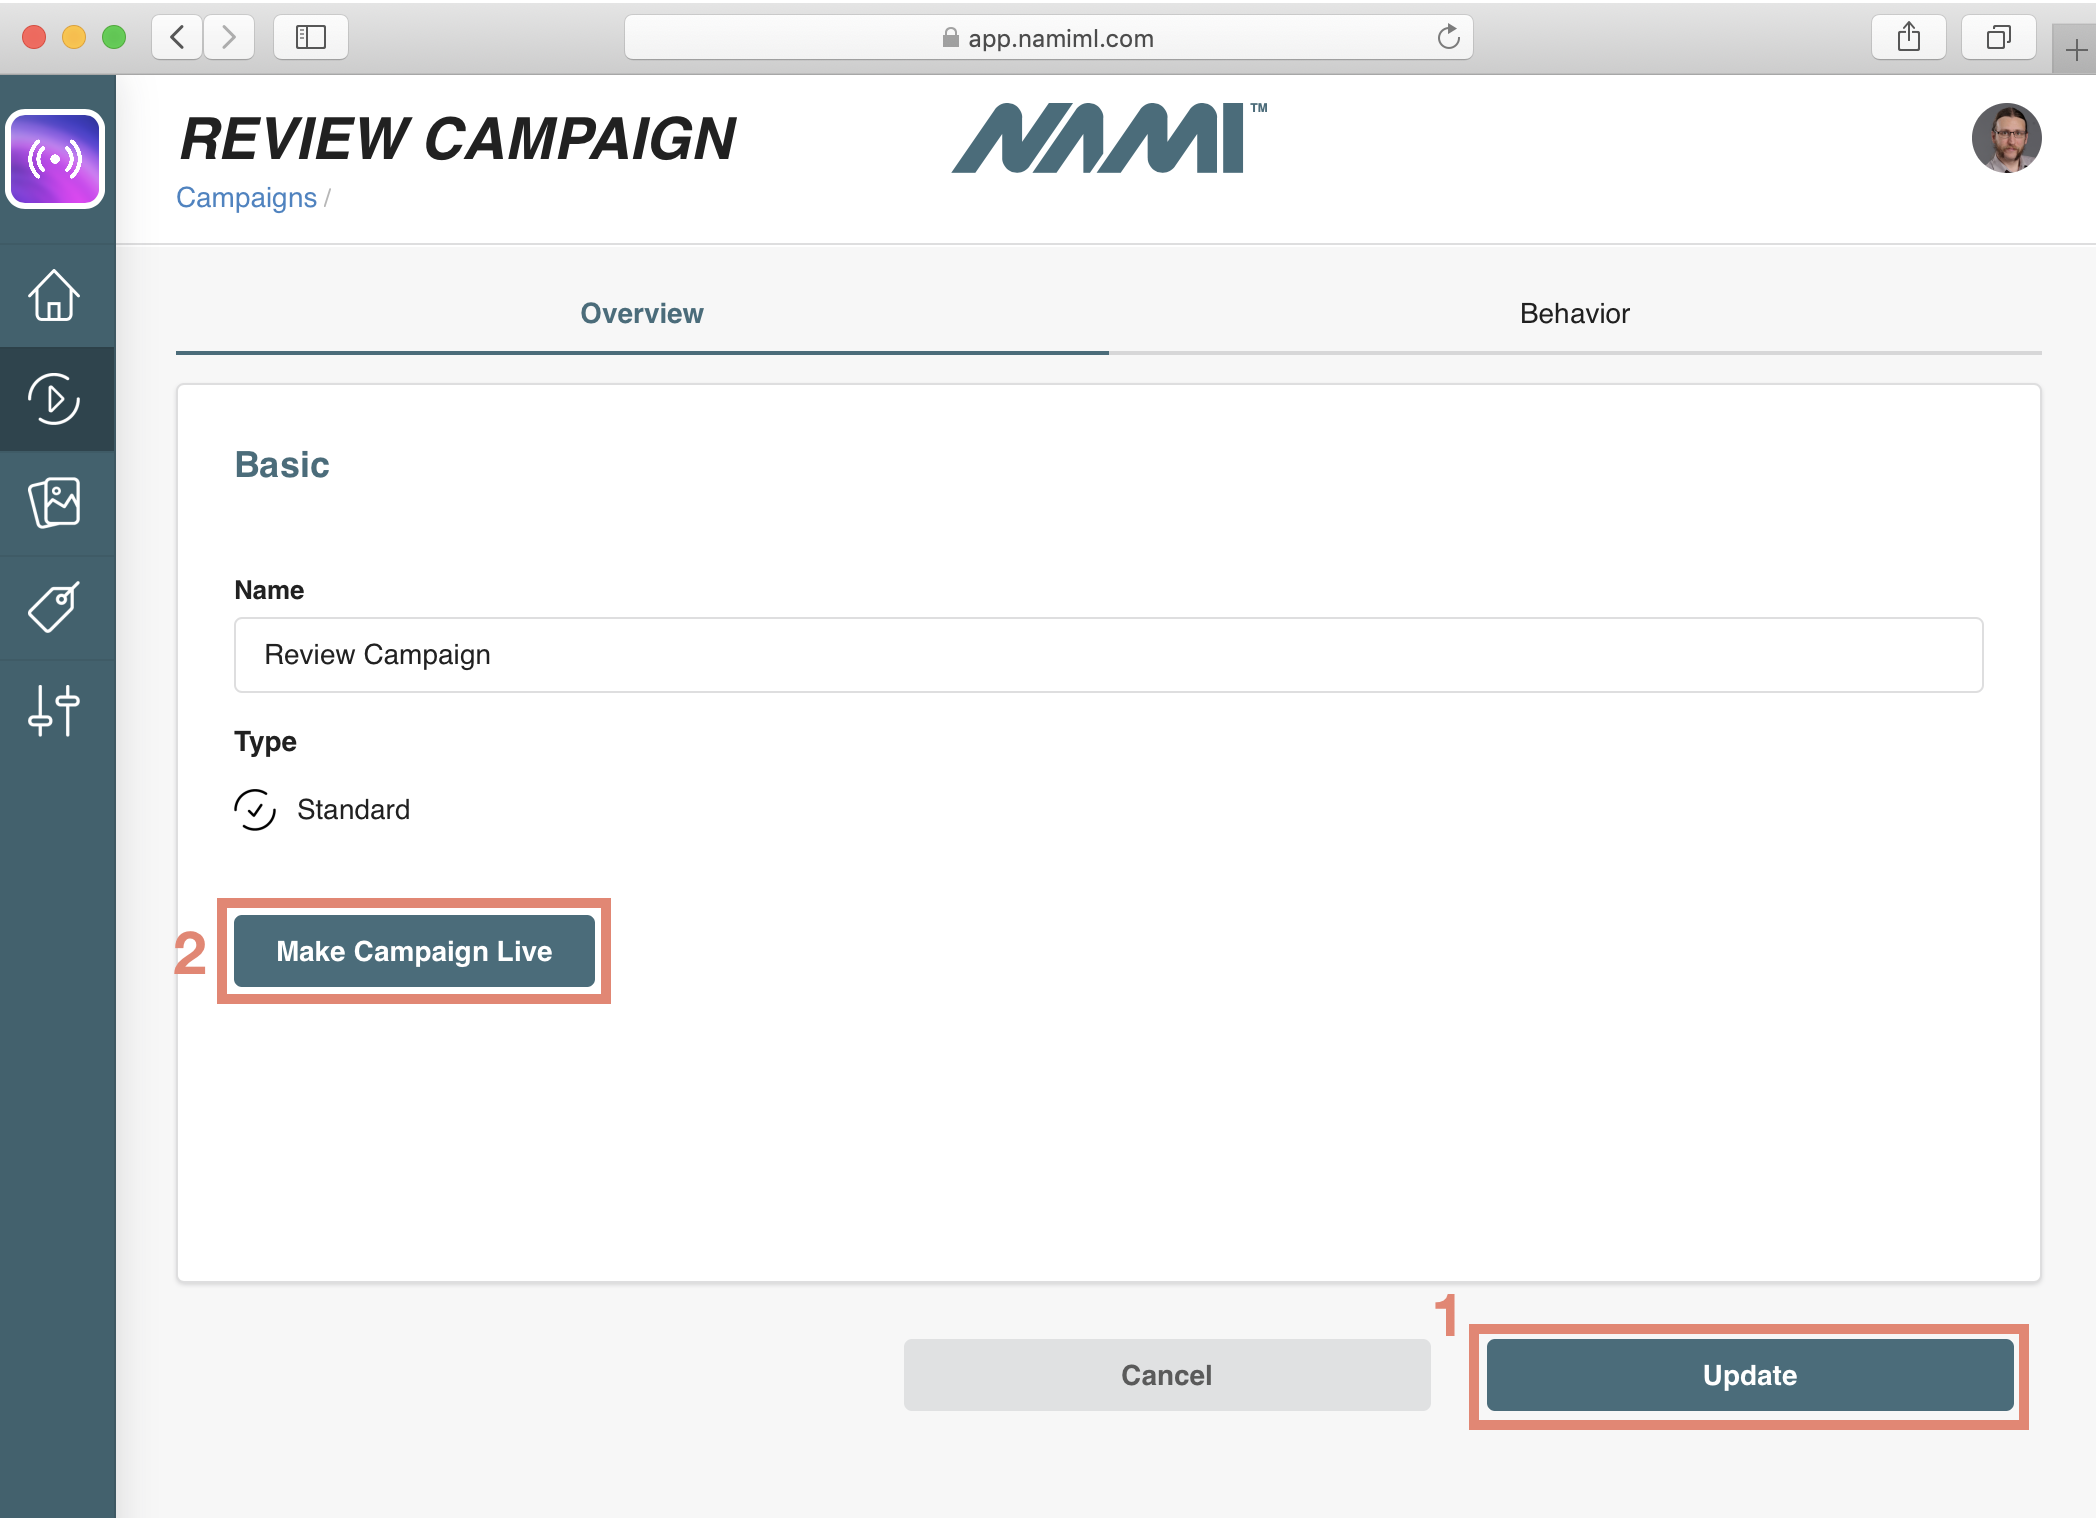
Your review campaign is now live in your app and ready for submission to the App Store.
Nami Best Practice
For the app review process, we recommend using a User Initiated Paywall instead of a Nami Triggered Paywall. Since the User Initiated Paywall can be found by explicitly clicking a button somewhere in your app, this will be an easier process to explain to the reviewer as well as be a more repeatable process.
If you do not have a User Initiated Paywall in your app, make sure you shut off limiting the paywall on the Nami Triggered Paywall so the reviewer will always see your paywalls.
Apps with Nami on the App Store
Similar to the paywall setup described above, if your app is already on the store, you'll want to use a campaign for review that also works with your app users.
Make sure you choose rules on the behavior tab that match how you wish your app users to encounter your paywalls.
Complete purchase product metadata in App Store Connect
Now that we've got our review paywall and campaign created, we need to get a screenshot of the paywall in our app. Open up your app in the Simulator and let's raise the paywall.
Once you have the paywall raised in the Simulator open the File menu and select New Screen Shot to save an image of the paywall. This will save a screenshot to your desktop with the name Simulator Screen Shot - <device name> - <timestamp>.png.
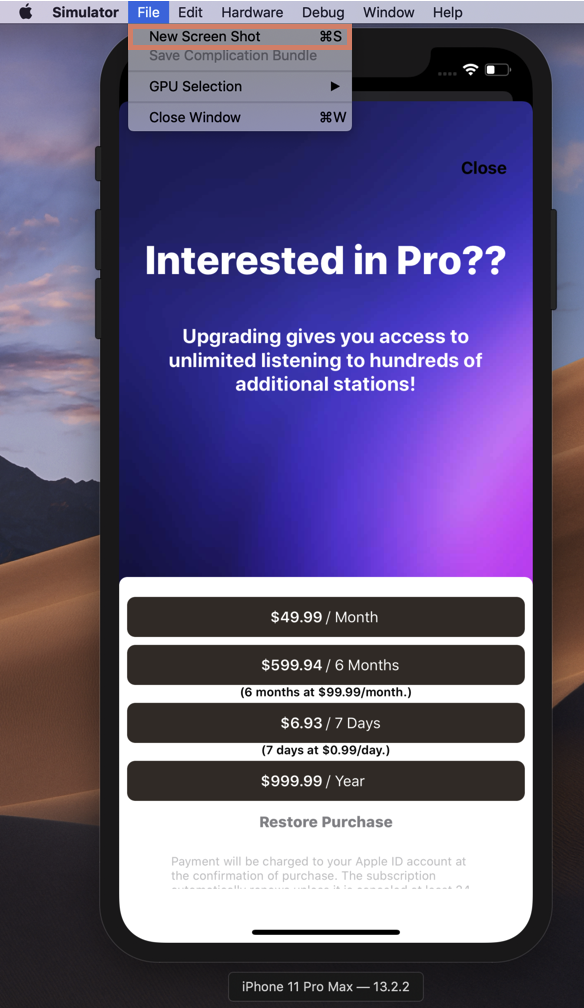
Let's head over to App Store Connect to add the appropriate metadata to your in-app purchase products.
After logging in, go to My Apps and then select your app from the list.
Then click on Features, make sure In-App Purchases is selected, and then head to the In-App Purchases section at the bottom of the screen.
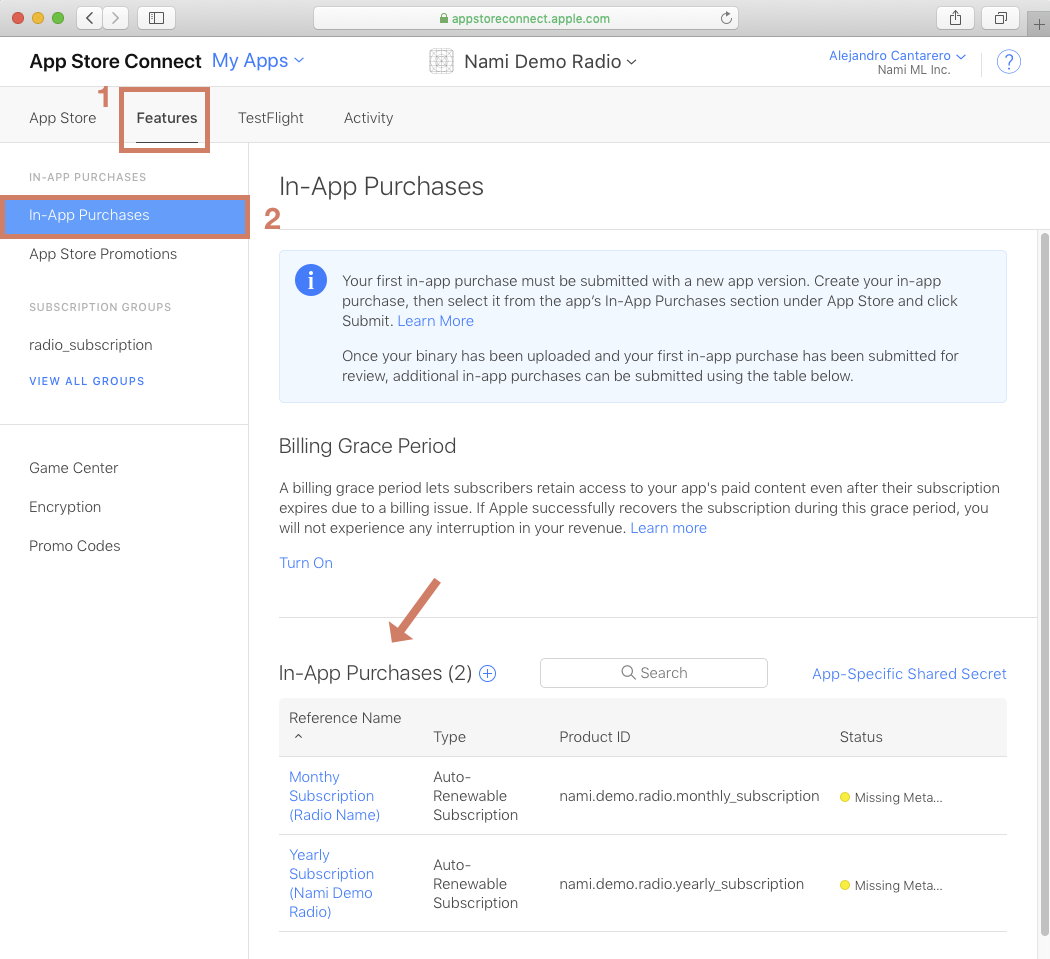
If you do not have any in-app purchase products yet, create them by clicking the + button. If you already have some products created like in the screenshot above, go ahead and click on them to open up the details.
After either creating a new product or opening an existing product, scroll all the way to the bottom section Review Information. Upload the screenshot from the simulator in the screenshot section and under the Review Notes add instructions about how the reviewer can find the paywall with this particular product. In our example, this screen will look like this when complete:
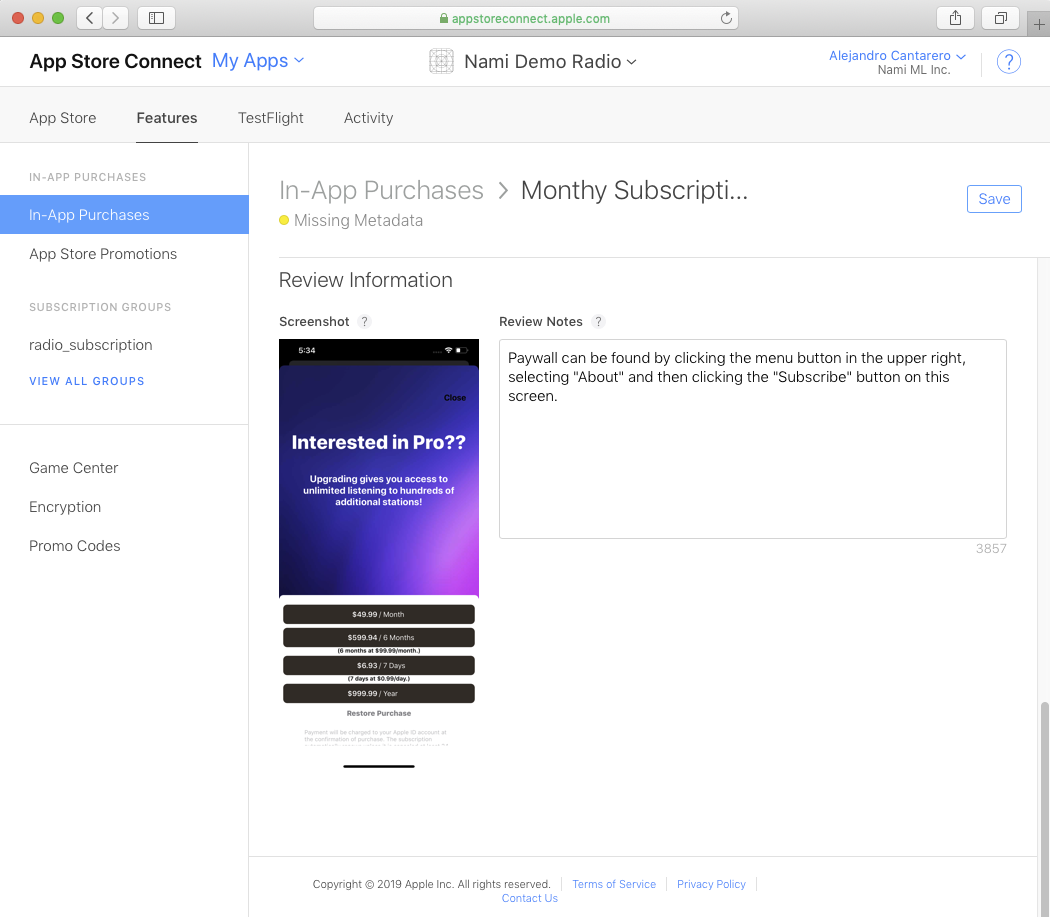
Make sure your product now has a status of Ready to Submit.
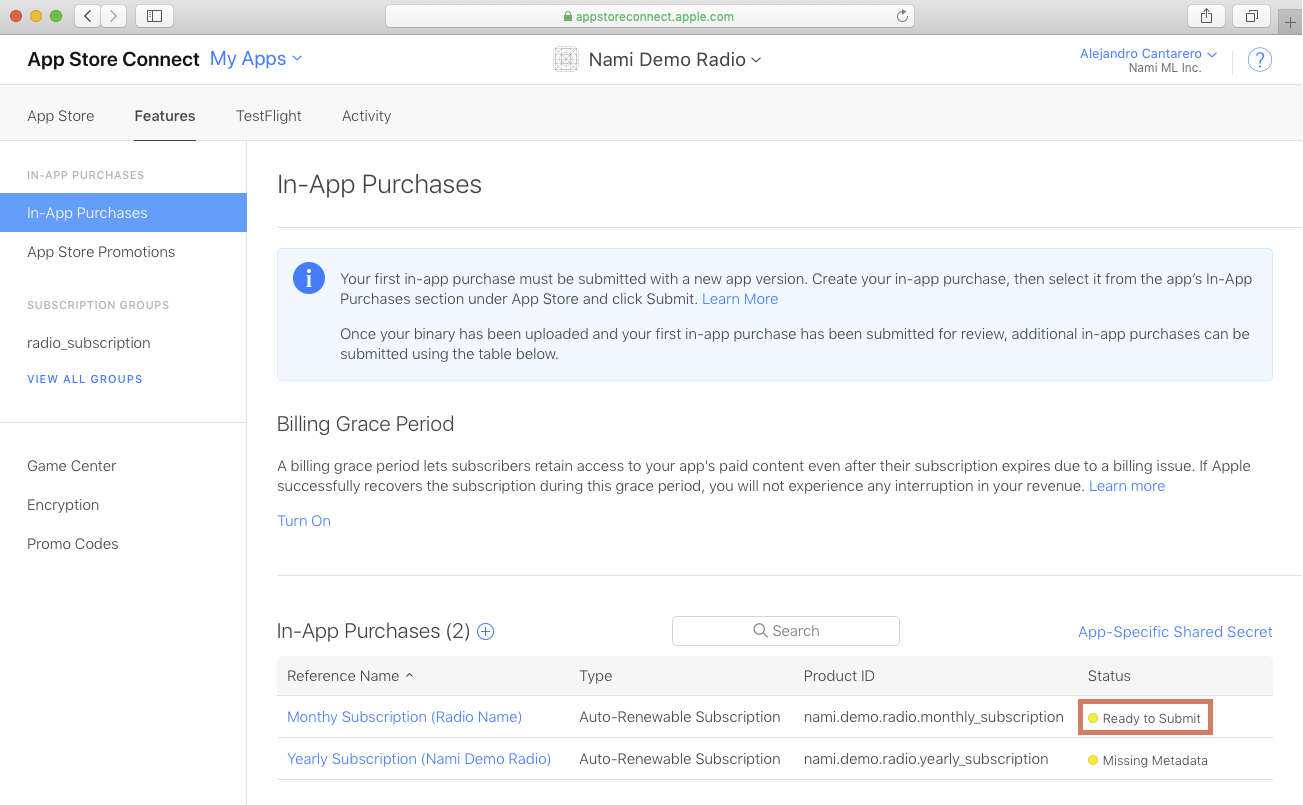
Repeat this process for each in-app purchase product you want to submit with your app.
Add your products to your submission
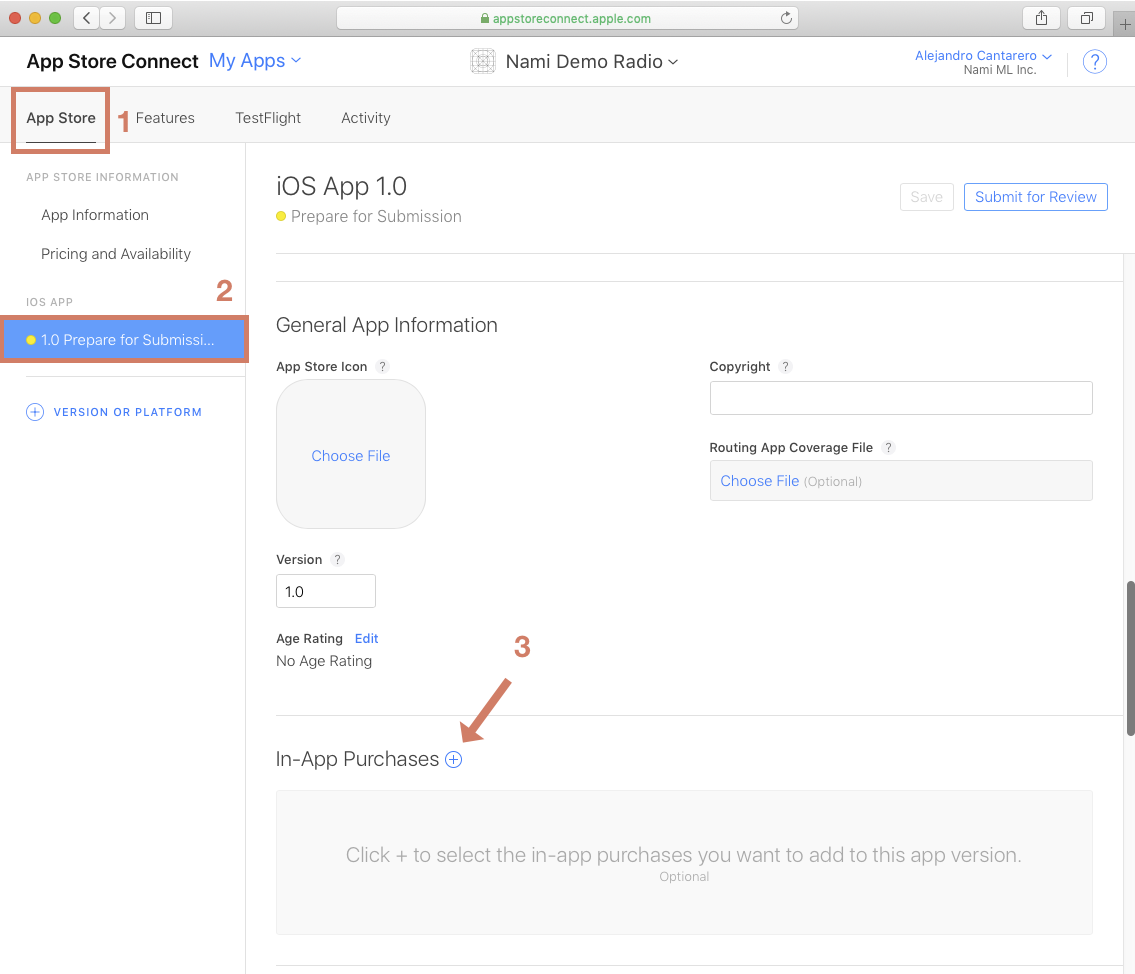
Now click back to App Store on the top nav, select Prepare for Submission, go to the In-App Purchases section and click the + button to add your products.
No In-App Purchases Section?
If you do not see the In-App Purchases section then your products may:
- Have status Missing Metadata
- Already be approved for use in your app
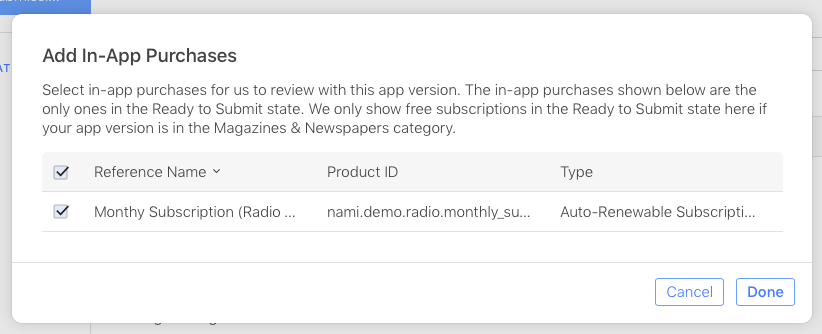
In the modal the appears after clicking the + button, select the products you wish to add to your app submission and then click done.
Restore purchases
Apple has quite a number of requirements buried in section 3.1.1 of its App Store Review Guidelines. One not to overlook is:
... you should make sure you have a restore mechanism for any restorable in-app purchases.
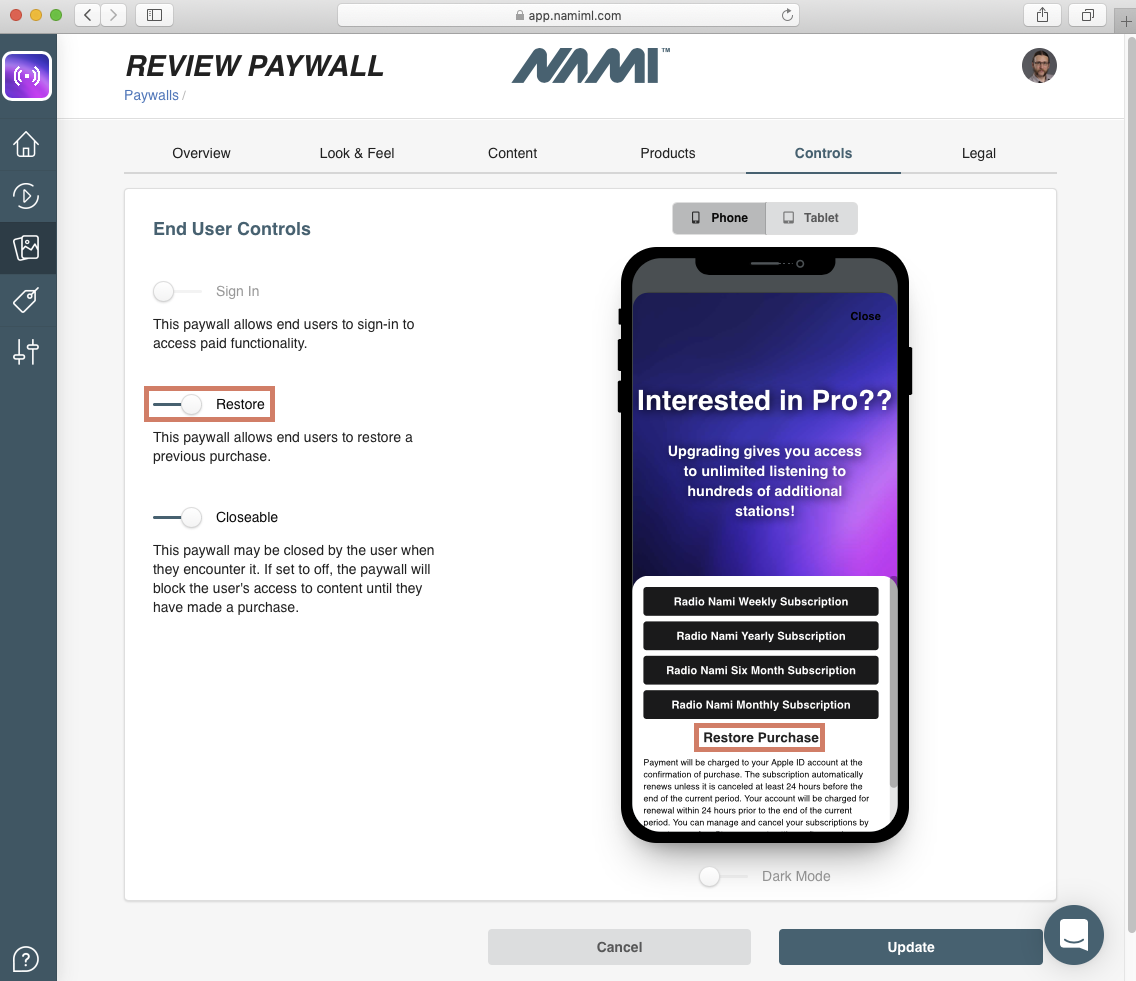
You may offer the ability to restore purchases in many spots in your app. If you do not already have a specific location in mind, you can add the ability to restore any purchases to a paywall created with the Nami Paywall Creator.
Simply open an existing paywall created with Nami or create a new one. On the Controls tab, make sure the Restore option is turned on. This will add a button to your paywall to allow your customers to restore any prior purchases they have made.
Subscription Information
Apple's App Store Review Guidelines also discuss providing clear information on what a user receives and at what price for a subscription product.
Various legal jurisdictions may also have rules around the transparency of what a customer is purchasing. Nami offers a few tools to help you share this information with your customers on your paywalls.
Nami Best Practice
Ensure your app has clear Purchase Terms, Terms of Use and a Privacy Policy. This is the simplest way to make sure you are compliant with all applicable laws and guidelines in the App Store.
This information does not necessarily have to be included on your paywall screens, but it does need to be available in your app.
Continue reading to see how to set these on your paywall screens in your app.
Terms of Use and Privacy Policy
Nami supports linking all your paywalls to an online version of your Terms of Use and Privacy Policy. You may choose to use one, both, or neither of these. The can be found in the App Settings screen on the Legal tab.
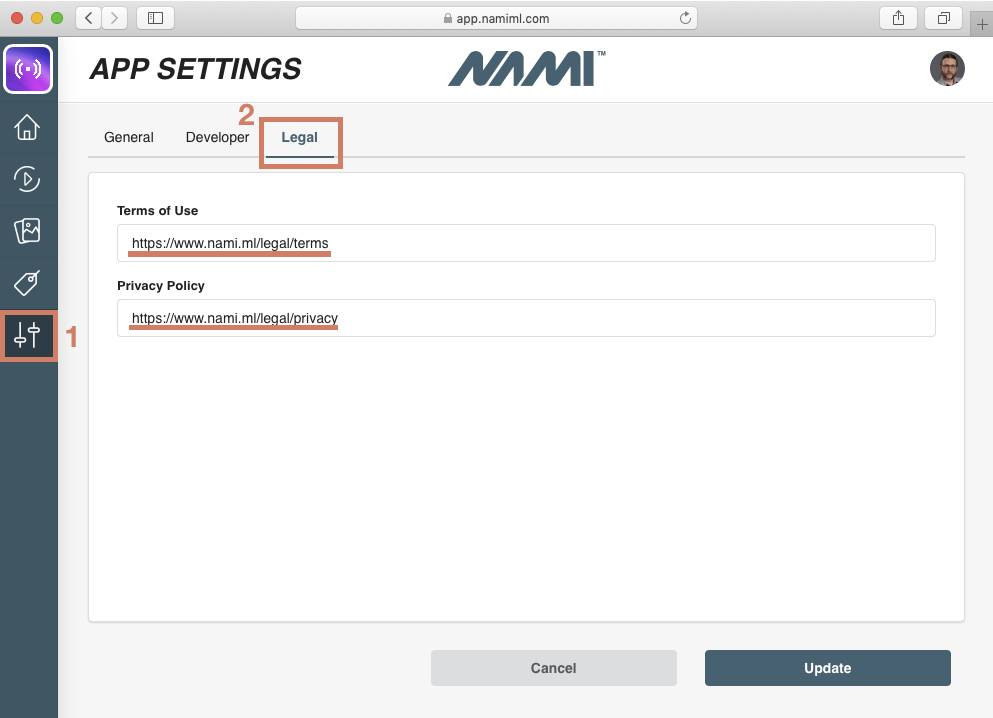
Enter a valid URL for each one you wish to use and you will see links to each display at the bottom of your paywalls.
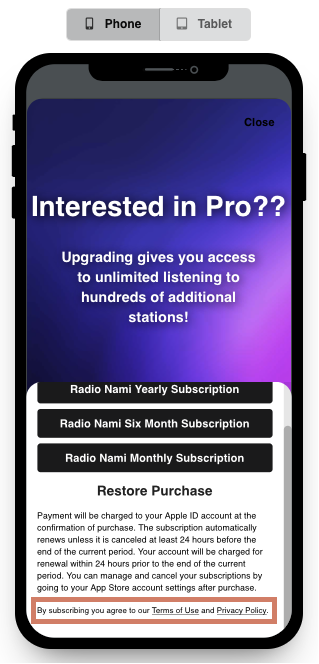
The links will open web views inside your app that will load your existing legal documents from the URLs you provided.
Purchase Terms
Nami supports adding Purchase Terms to each of your paywalls. These are unique to each paywall and can be tailored to be specific to the products and terms you are offering in each case. Use this text to add any additional explanations to your purchase products to make sure they are clear to your customers.
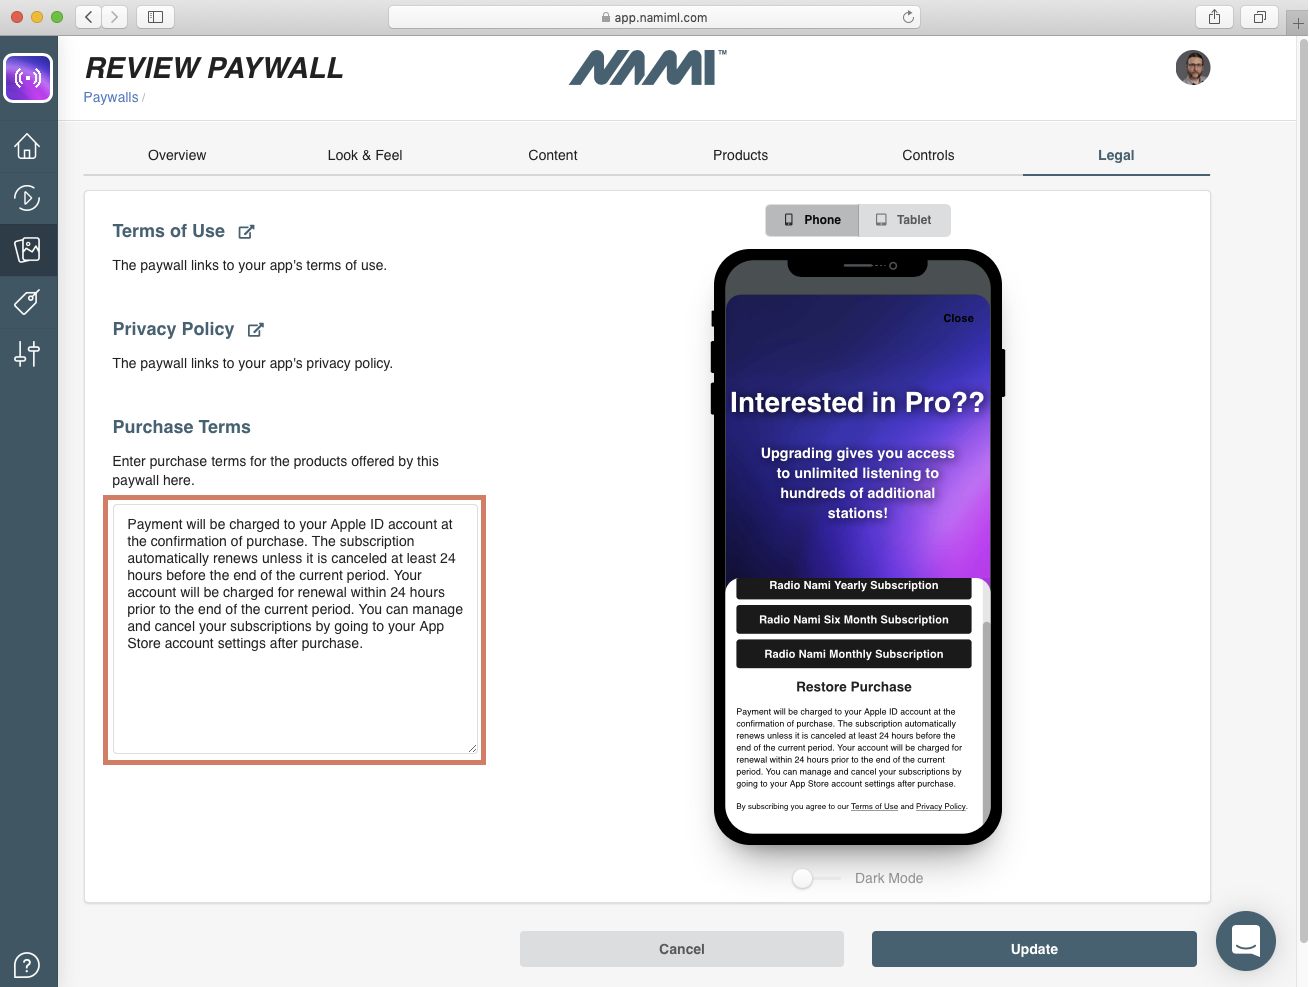
Now you are all set with the in-app purchase basics you need to have in place with Nami to help you get through the App Store Review process.
Last step before release
Once your app has been approved, don't forget that you might want to change your Paywall and Campaign before releasing it to the store.
Updated almost 5 years ago
