
mParticle
Integrate Nami with mParticle so you can send data from Nami to other services that you use and build audiences based on Nami ML attributes.
mParticle Setup
Nami uses mParticle Act As Feeds where we send data separately for each platform (such as iOS and Android on mParticle). You'll need to repeat the steps below for each platform you want to configure to send data from Nami to mParticle.
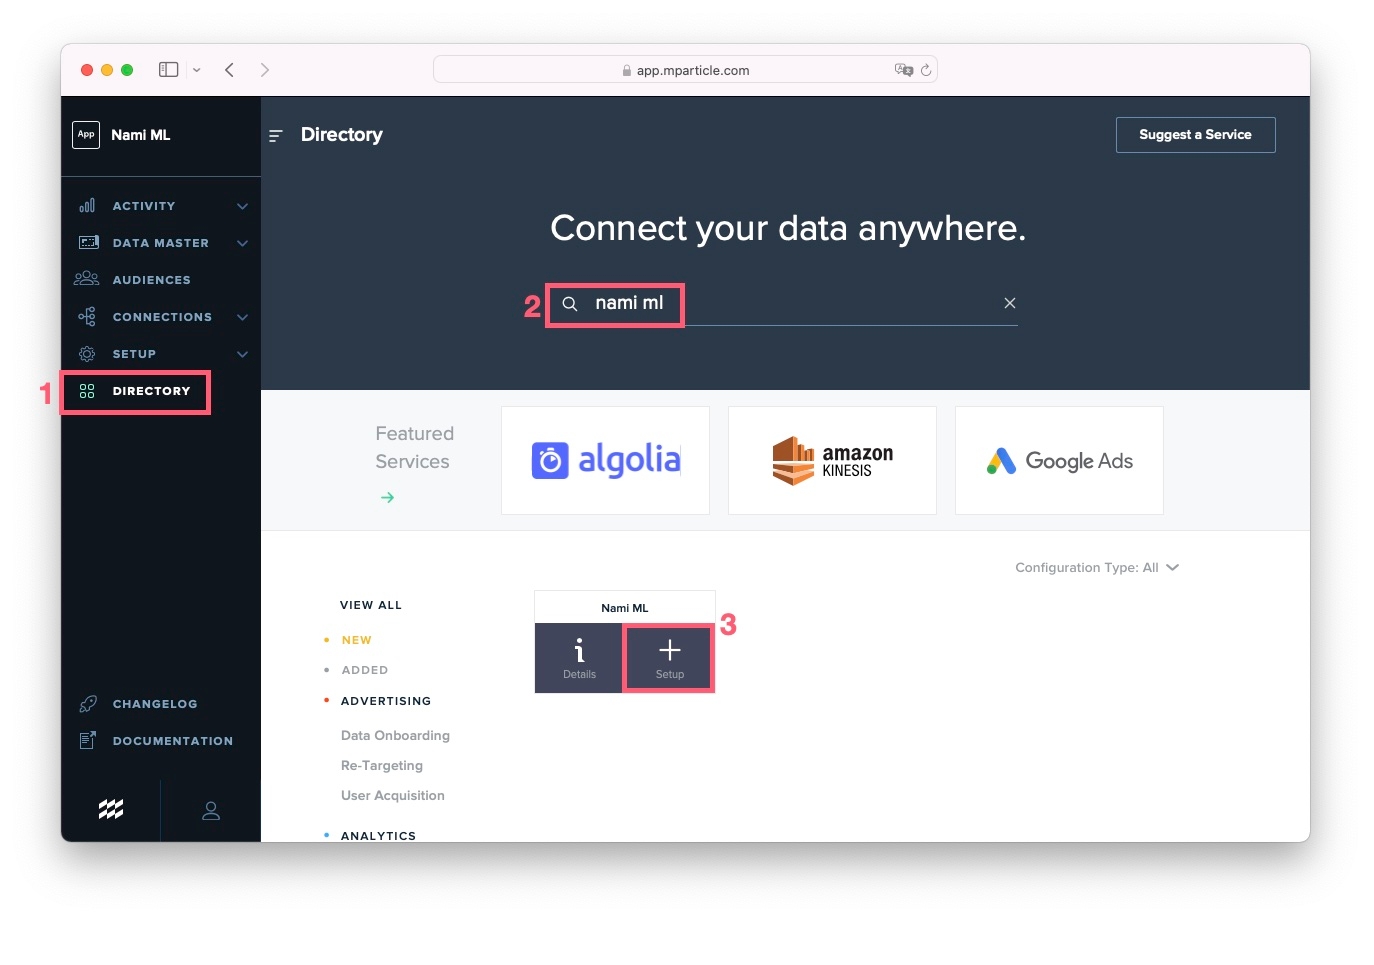
To get started, find our integration in https://app.mparticle.com/ by clicking on the Directory in the navigation, entering nami ml in the search box, hovering over our tile, and then clicking the Setup button.
If this is the first time you've set up a Nami ML integration, you'll see a modal where you need to select the integration type as INPUT Feed by clicking the checkbox and then clicking the Configure button.


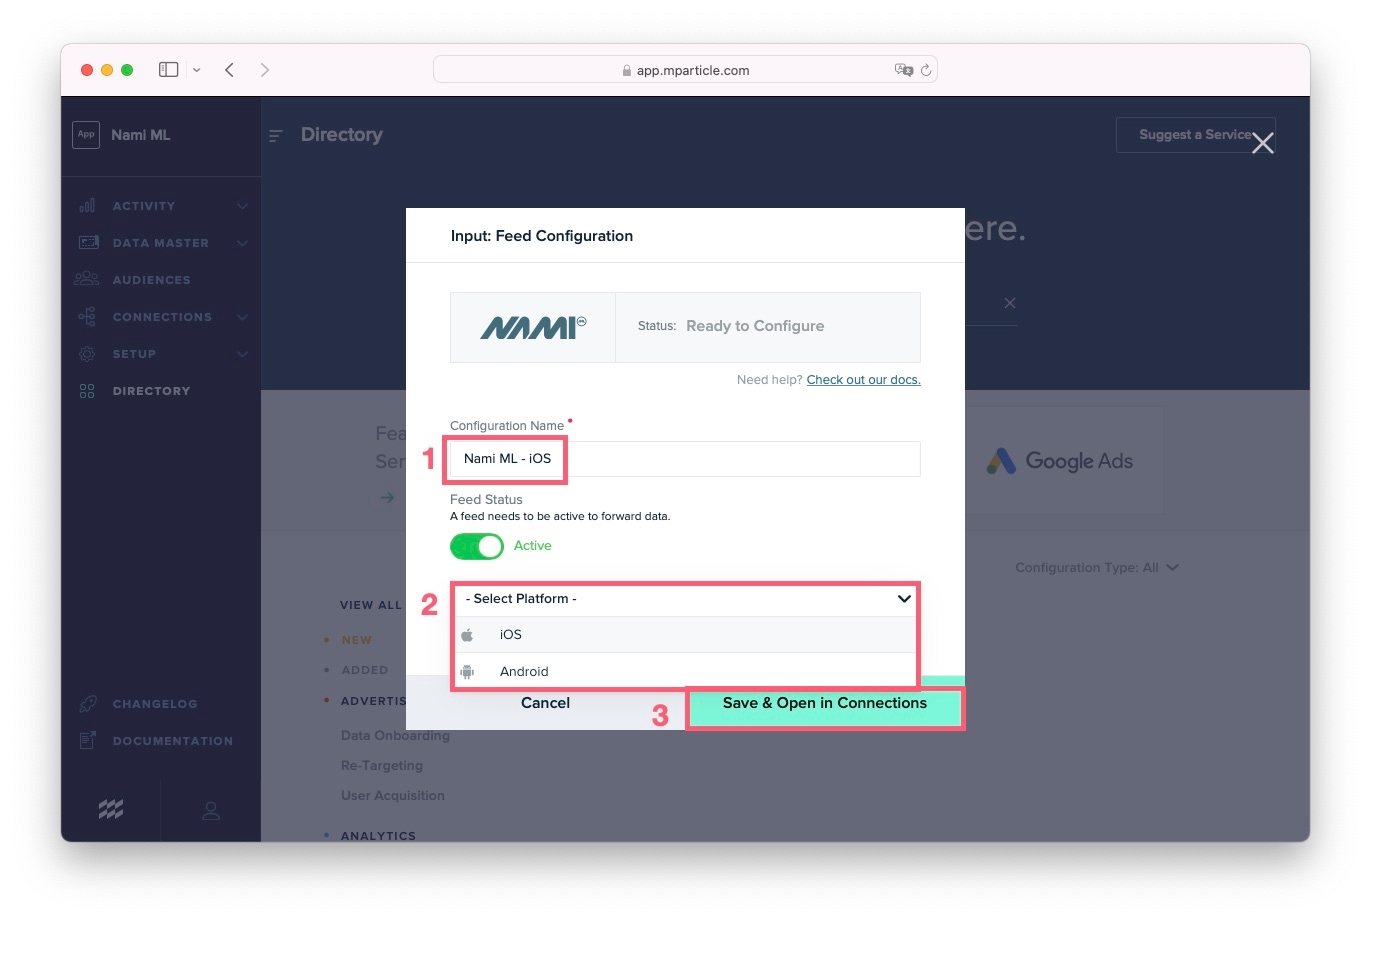
On the next screen, you'll need to enter a Configuration Name and Select a Platform from the dropdown. After you've selected a platform, click the Save & Open in Connections button. We recommend clearly naming your Configuration based on the platform as you'll end up with multiple feeds when you are done.
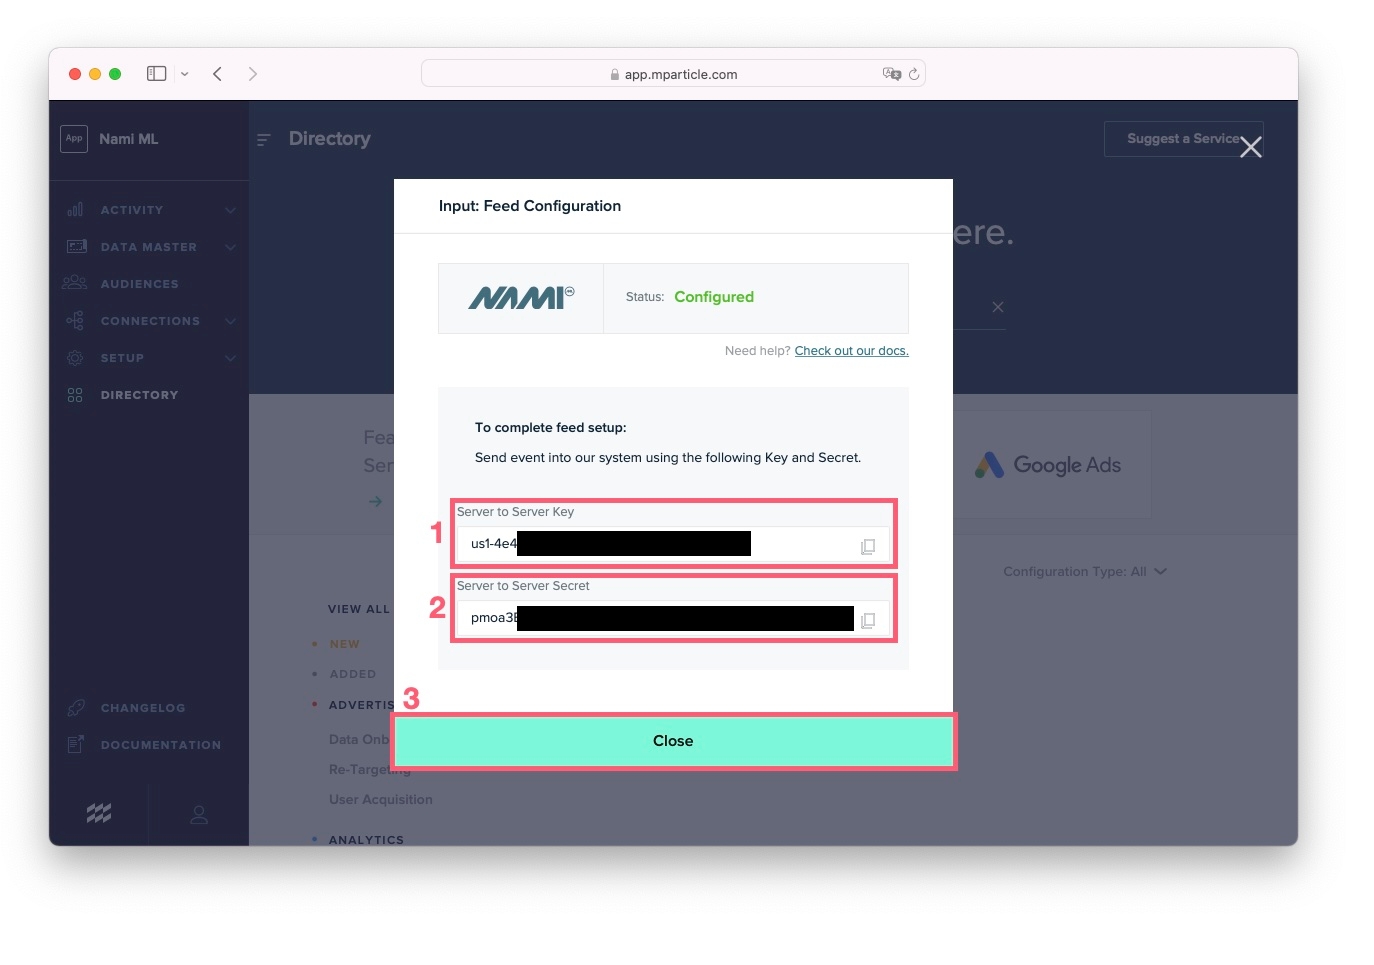
On the next screen copy and save the Server to Server Key and the Server to Server Secret. You'll need these to set up mParticle in the Nami Control Center in the next section. Then click the Close button.
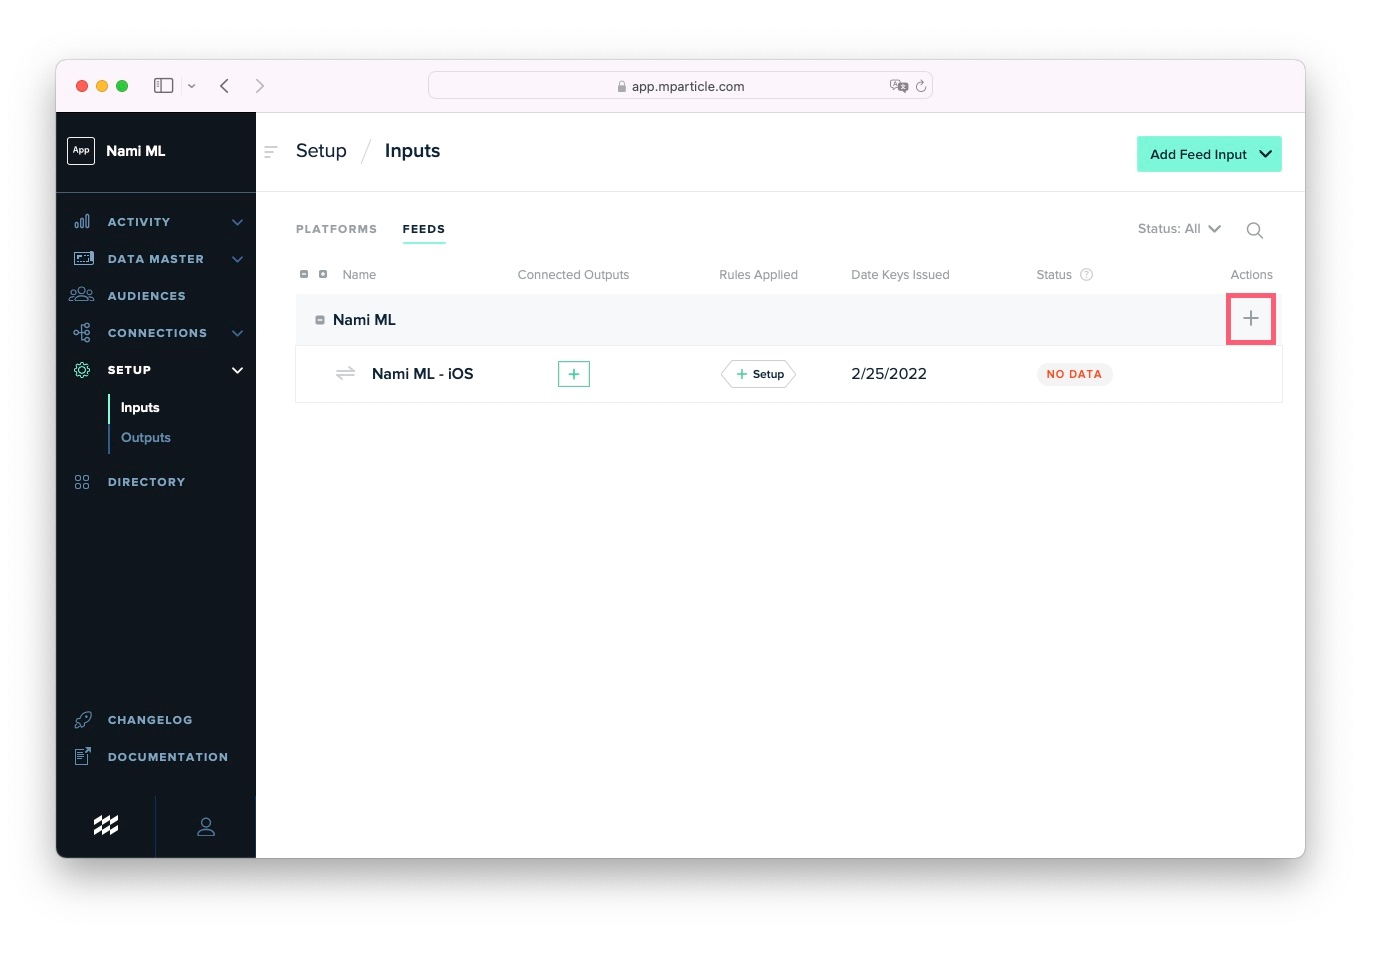
To add an additional feed, navigate to Setup, Inputs and then click the Plus Button next to Nami ML.
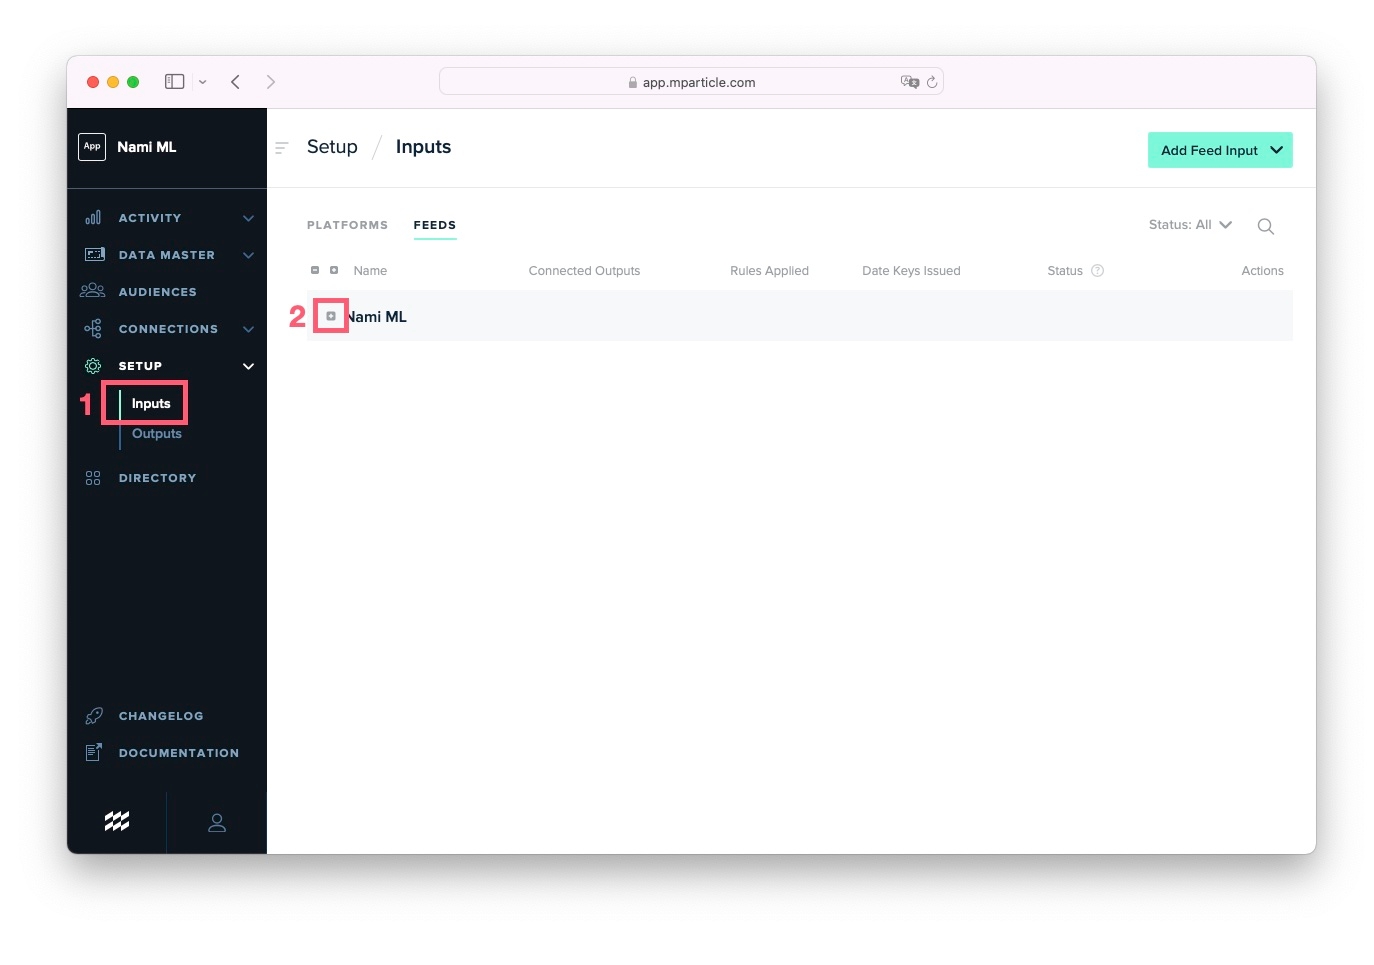
Then click the Plus Button that appears on the right side of the screen. Go back to step 3 and complete the configuration of the new feed.
Configure mParticle in the Nami Control Center
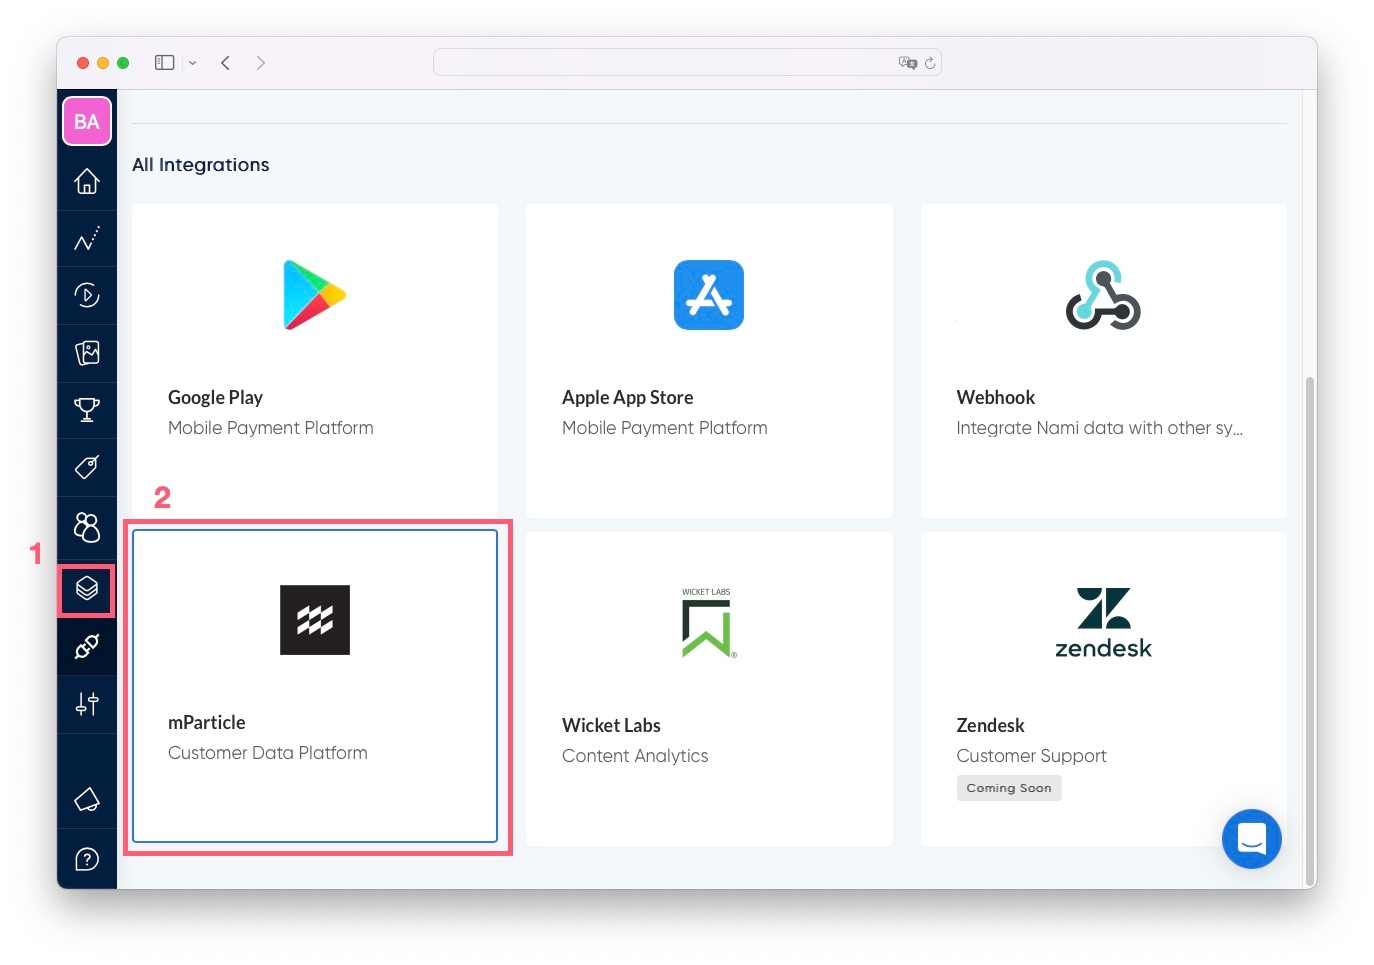
Log in to the Nami Control Center and Navigate to the Integrations screen. Then scroll down to All Integrations and click the mParticle tile.
On the next screen toggle on Enable Integration. Then select Enable for events from only selected platform and choose your platform from the dropdown. Enter a Name, the Server to Server Key and Server to Server Secret that you generated in the previous section. Finally, select a value to use for the Customer ID in the dropdown.
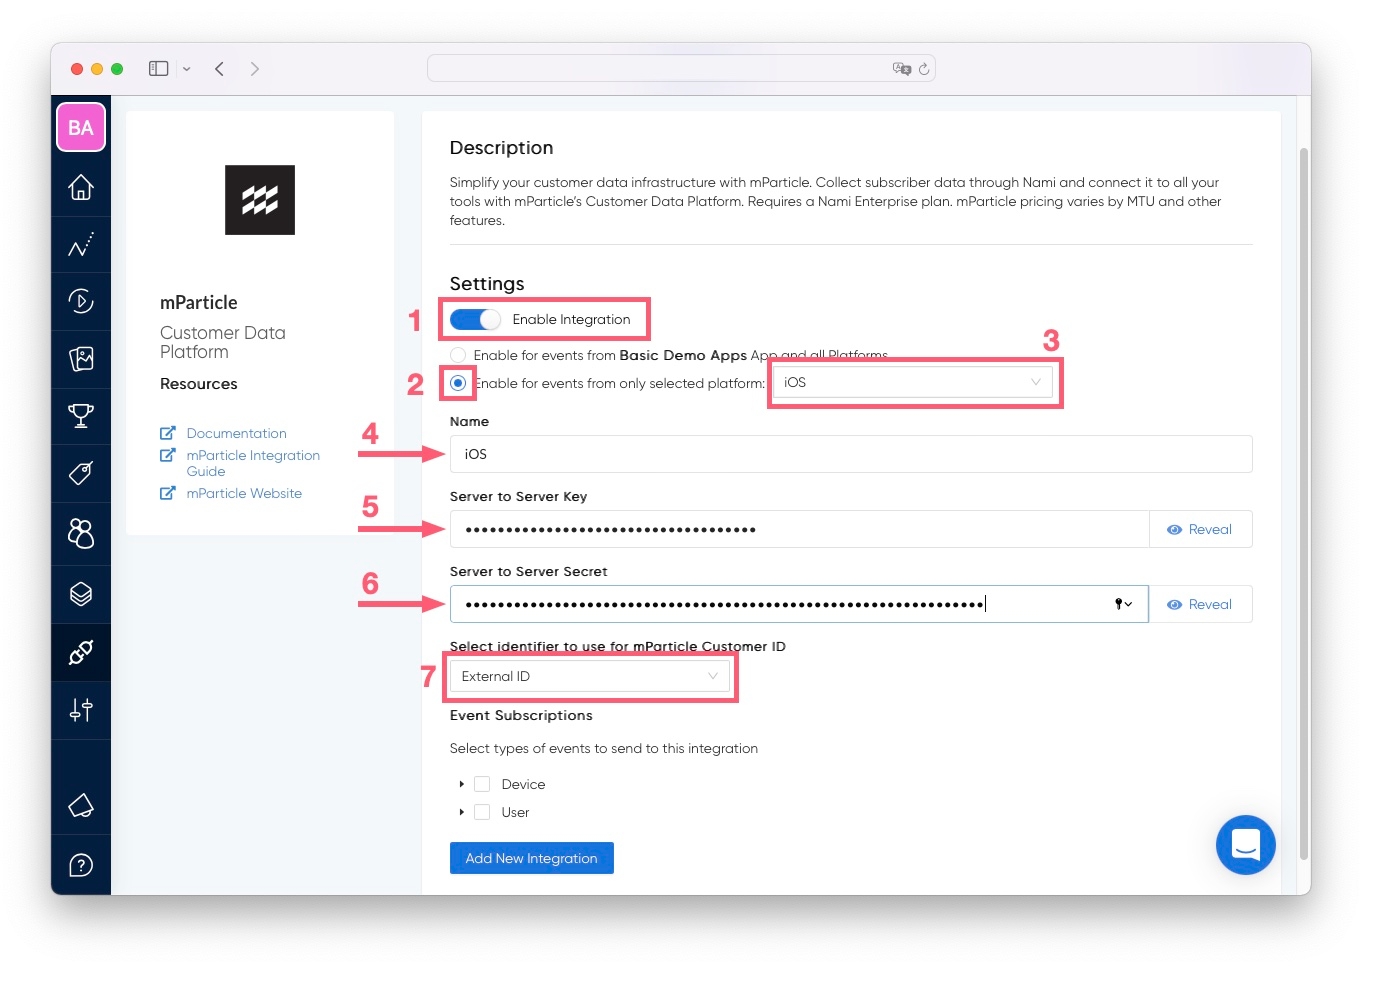
For step 2 in the image above, Enable for events from "Your App Name" App and all Platforms is a legacy configuration that should no longer be used for new mParticle feeds.
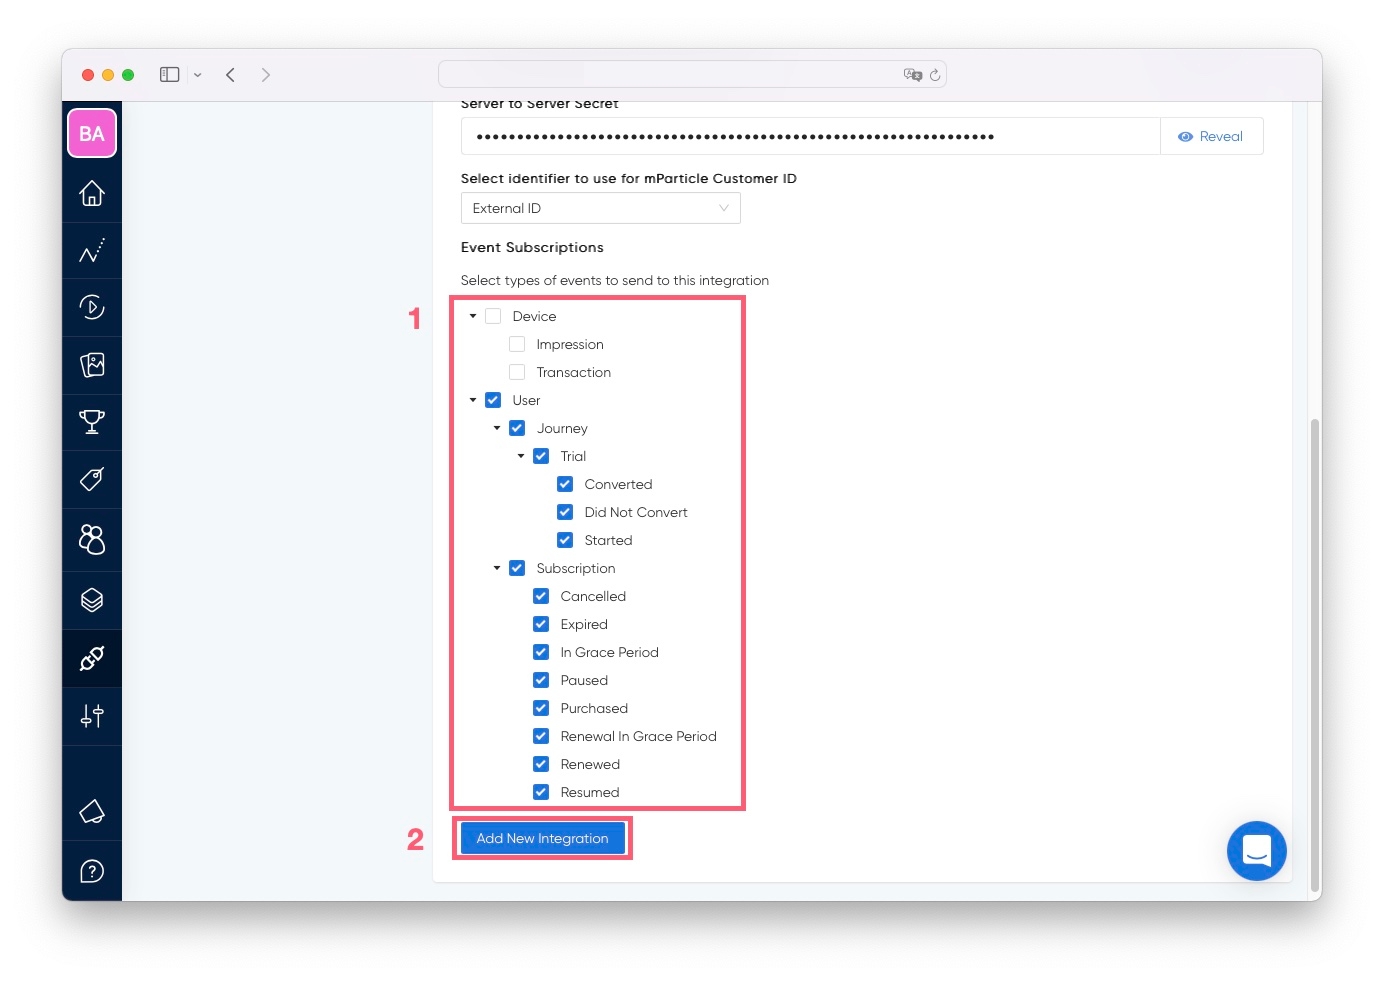
Select the events you wish to send to mParticle in the last section of the screen by expanding and clicking the checkboxes. An overview of these data is provided in the next section. When complete click Add New Integration.
Repeat these steps to set up each Platform Feed you created for mParticle.
Overview of data sent to mParticle
The following events generated by the Nami ML platform are currently available to be sent to mParticle. You may choose any subset of these events to be sent.
device.impressiondevice.transactionuser.journey.trial.converteduser.journey.trial.did_not_convertuser.journey.trial.starteduser.subscription.cancelleduser.subscription.expireduser.subscription.in_grace_perioduser.subscription.pauseduser.subscription.purchaseduser.subscription.renewal_in_grace_perioduser.subscription.reneweduser.subscription.resumed
See our full list of Event Types here as well as more documentation on how to interpret each event.
mParticle Customer ID
mParticle uses a Customer ID field to define users in their platform. It is important that you properly set this ID in the Nami ML platform so that users in our platform are properly linked with users in mParticle.
There are 2 different IDs that are available to be used as the Customer ID.
Nami User ID This is Nami's internal ID that tracks a user in our platform. If you have no other identifier you may use this.
External ID This is the identifier that you set in the SDK with a call to setExternalIdentifier. We expect most customers to use the External ID for the mParticle Customer ID.
User Attributes
We provide the following user attributes on all user.* events sent to mParticle.
namiml_active_entitlements
Array of entitlement_ref_id's for each active entitlement that the user currently has access to.
namiml_active_skus
Array of sku_ref_id's for the associated purchases with each active entitlement the user currently has access to.
namiml_device_ids
Array of UUIDs for each device that belongs to the user.
namiml_device_platforms
Array of app_platform_id's for each device.
namiml_former_subscriber
True if the user previously paid for a subscription and currently does not have an active subscription.
namiml_in_grace_period
True if the user is currently in grace period, false otherwise.
namiml_in_trial_period
True if the user is currently in a free trial, false otherwise.
namiml_in_intro_offer_period
True if the user is currently in an intro offer period, false otherwise.
For more information, see the documentation on mParticle's website.
Last updated