Nami Public Documentation
Sign In
Nami Documentation
Nami Documentation
  • Get Started
    • Overview
      • Key Concepts
      • Data Collection
      • Built for Privacy
    • Evaluating Nami
    • SDKs
      • Apple Native SDK
      • Android Native SDK
      • Amazon Native SDK
      • Roku Native SDK
      • React Native Cross-Platform SDK
      • Flutter Cross-Platform SDK
      • Unity Cross-Platform SDK
      • Release Notes
        • Find Nami SDK Version
    • Quickstart Guide
  • Subscription Management
    • Overview
    • Products
      • Archive Products
      • Sync Products
    • Entitlements
    • Customer Screen
    • Accounts and Login/Logout
    • Advanced Use Cases
      • Upgrades and Downgrades
      • Supported Purchase Change States by Platform
      • Restoring Purchases
      • Working with Consumable IAPs
  • No Code Paywalls
    • Overview
    • Paywall Creator
      • Using the Creator
      • Paywall Layout
      • Components
        • Editing, Deleting, Reordering
        • Hiding Components
        • Video
        • Collapse
      • Editable Properties
        • Focused Styling
        • Safe Area
      • Conditions
        • Notched Devices
        • Product Entitlements
      • Adding Products
      • Repeating Product Group
      • Product Fields
      • Capabilities
        • Featured Styling
        • Selected Styling
        • Custom Brand Fonts
        • Carousel
        • Trial Eligibility
        • Deeplink Button
        • Introductory Offer Eligibility
        • Login Check
        • Product Groups
        • Conditional Product Groups
        • Offer Eligibility and Purchasing
        • Screenreader Text
        • Personalization Tokens
        • Custom Variables
        • Multipage
        • Custom Data Source
        • Advanced Video Features
        • Product Error States
      • ❓FAQs
        • Designing Paywalls in Figma
        • Guide to Building a Paywall from Scratch
      • 🎁Releases
        • Roadmap
    • Paywall Templates
      • Pacific
      • Pacific Premium
      • Trident
      • Starfish
      • Mantis
      • Venice
      • Venice Premium
      • Honest
      • Catalina
      • Oyster
      • Puffin
      • Marina
      • Beluga
      • Driftwood
      • Lagoon
      • Pisces
      • Aquarius
      • Conch
      • Lionfish
      • Moray
      • Tetra
      • Lighthouse
      • Puffin Tablet
    • Managing Paywalls
      • Archiving a Paywall
      • Duplicate a Paywall
    • Paywall Smart Text
    • Pricing Eligibility States
    • Pricing Eligibility by Platform
    • Nami Paywalls in Different Languages
    • Legacy Paywalls
  • Campaigns
    • Placements
      • Create a Placement
      • Deeplink Placements
      • Archiving a Placement
      • Managing Lots of Placements
      • Export Placements
    • Campaigns
      • Campaign Filters
        • Campaign Use Cases
      • Archiving a Campaign
      • Scheduling a Campaign
      • Campaign Conversion Events
      • Managing Lots of Campaigns
      • Campaign Troubleshooting
    • A/B and Multivariate Testing
      • Selecting an A/B test winner
      • A/B Test Allocation
  • Integrations
    • All Integrations
    • Billing Platforms
      • Apple Integration
        • App Store Setup
          • Privacy Details
        • Platform Integration
        • App Store Server Notifications
        • Store Credentials
          • App Store Connect Shared Secret
          • Apple App Store Connect API
          • Apple In App Purchase
        • Add a Product
        • Platform Sync
        • SDK Integration
        • Troubleshooting
        • Testing and Development
          • Apple Testing Environments
          • Setting up Device Sandbox Test Environment
          • Setting up StoreKit config in Xcode
      • Google Integration
        • Google Play Store Setup
        • Platform Integration
        • Service Account
        • Real-time Developer Notifications
        • Add a Product
        • Platform Sync
        • SDK Setup
        • Troubleshooting
          • Supporting Android minSdkVersion 25 or lower
          • Requested product is not available for purchase
          • Unsupported Version of Play Billing
      • Amazon Appstore Integration
        • Create Amazon Android App
        • Platform Integration
        • Shared Key
        • Real-time Event Notifications
        • Add a Product
        • SDK Integration
        • Testing
      • Roku Integration
        • Platform Integration
        • API Key
        • Transaction Notifications
        • Add a Product
        • SDK Integration
      • Web Integration
    • Analytics Tools
      • Adobe Analytics
      • Amplitude
      • Google Analytics
      • mParticle
      • 3rd-Party Analytics
    • Subscription Management
      • Nami Subscription Management
      • Bring your Own Payment Code
    • CDP Integrations
      • Adobe CDP Integration
      • Amplitude CDP Integration
      • Custom CDP Integration
      • Generic CDP Integration
    • Other Integrations
      • Wicket Labs
      • Webhooks
        • Introduction to the Nami ML Event System
        • Event Types
          • Purchase Status Updates
          • Events for Upgrades, Downgrades, and Crossgrades
        • Event Subscriptions
        • Understanding Transferred Events and Accounts
      • API Access
    • Events Feed
  • Analytics
    • Using Charts
    • Paywall Analytics
      • Impressions
      • Paywall Conversion Rate
      • Sessions
      • Active Devices
    • Subscription Analytics
      • Revenue
      • MRR
      • Purchases
      • Trial Starts
  • Nami Account
    • Manage your Apps
      • Find your Nami App Platform ID
      • Setting up Legal Text for your Apps
    • Organization
      • Configuring Organization Security Policies
      • Billing
    • Invite your Team
      • Roles
    • Manage your Account
      • Two-Factor Authentication (2FA)
Powered by GitBook
On this page
  • Creating StoreKit Config File
  • Add Products to StoreKit Config File
  • Use StoreKit Config File in Xcode
  • Advanced Purchase Testing
  1. Integrations
  2. Billing Platforms
  3. Apple Integration
  4. Testing and Development

Setting up StoreKit config in Xcode

Creating StoreKit Config File

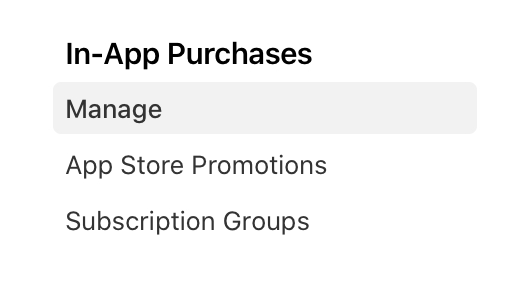
To start with, go to App Store Connect, go to your application page and click on "Manage" for in-app purchases.

There you can see a list of the products defined in your application. Find the ones you want to use for testing, then click one one to load product details:

[block:image] { "images": [ { "image": [ "https://files.readme.io/0c5eb19-Screen_Shot_2020-09-17_at_8.47.47_PM.png", "Screen Shot 2020-09-17 at 8.47.47 PM.png", 2436 ], "caption": "Hint: In pricing dropdown can filter to just US and Canada pricing." } ] } [/block]

Open your application project in Xcode and create a new StoreKit Configuration File.

You can choose whatever name you like and save it into your project; if desired you could even have multiple StoreKit Configuration files.

Do not add it to the project on creation; it actually gets set up in the application Scheme as we'll see shortly.

The configuration .storekit file will be added to your project navigation, where you can then select it to edit.

Add Products to StoreKit Config File

When you have the configuration open for editing, use the "+" button to add the product you pulled up the definition for in App Store Connect.

You can choose whatever type of product you have, in this example case I'll add a subscription product.

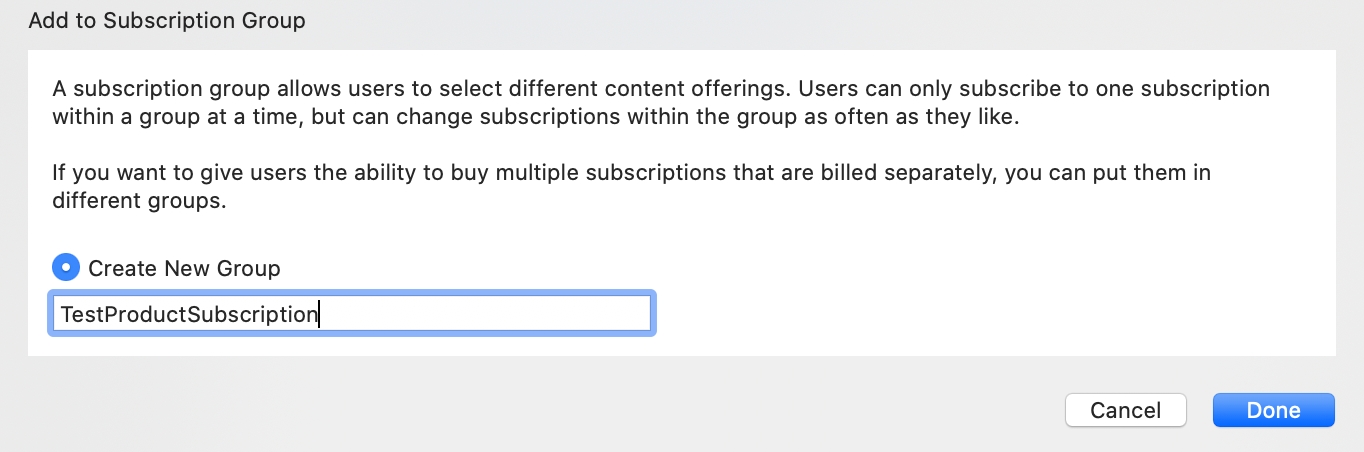
As a first step because I've not added a subscription product before, it will ask for a subscription group - it's a good practice to name this group the same as you have in your App Store Connect product:

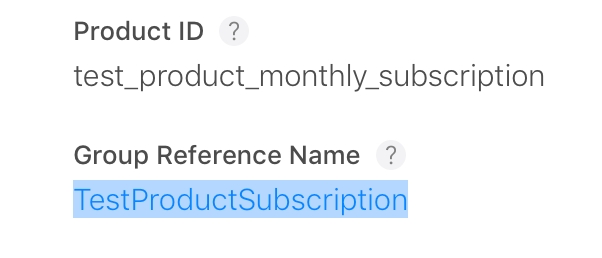
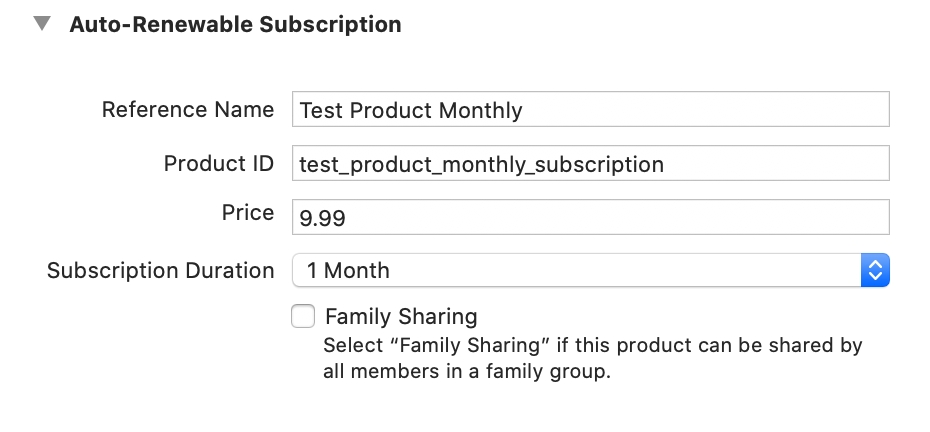
Now we have a new product with a temporary name, ID, and price.

The most important thing to change is to edit the product ID to match what you have in App Store Connect since your code will be expecting a product with a specific product ID, as I've done with this example product:

You can enter as many products as you like.

Use StoreKit Config File in Xcode

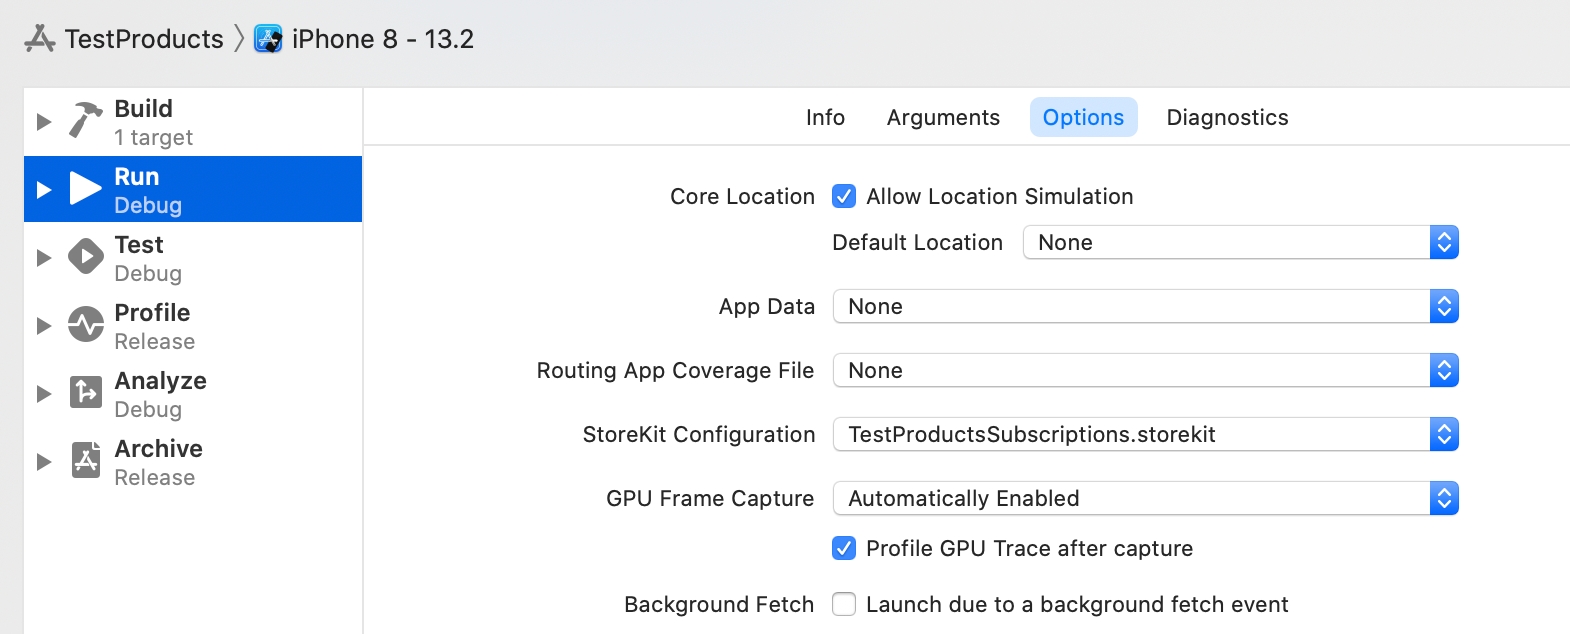
Now that we have a StoreKit configuration file, how can we make use of it? In the top menu bar target dropdown, select "Edit Scheme".

When you select Edit Scheme, you'll be able to select the configuration file you just created for the "StoreKit Configuration" entry.

When you activate this configuration, it will stay enabled for any change in simulator or device you select to run on. Note that it will not have any effect on pre-iOS 14 simulators or devices, it needs iOS 14 to take effect.

Side note: After adding this Configuration to the scheme, the project will still load and work in older versions of Xcode but they may revert or clear the chosen StoreKit configuration.

Now when I run on an iOS 14 simulator I see the product I added on my payment screen:

Note that in this case the paywall is showing only the product I entered correctly, that's also the only one that would work for any purchase attempts that used StoreKit to purchase. The others are products the paywall knows should be there, but provides only placeholder values for since it can find only one of the three products desired.

📘 Testing Best Practice

Keep the number of products defined in your StoreKit configuration file small so it's easier to keep up with App Store Connect changes.

📘 When testing with a StoreKit configuration file enabled, you are not using a Sandbox account. If you want to run a device build with a Sandbox account, simply de-select the StoreKit config in the application Scheme.

Advanced Purchase Testing

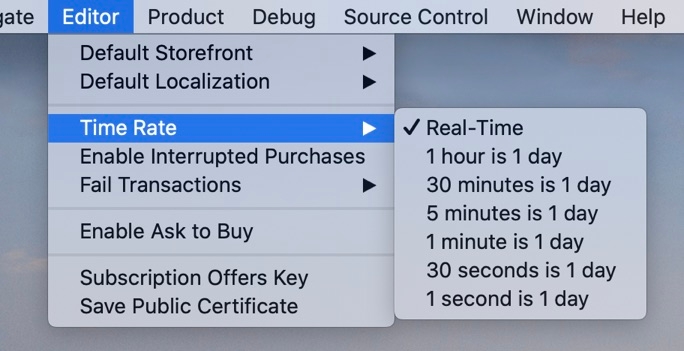
While editing the StoreKit Config file, you can now access advanced purchase testing options.

Default Storefront Allows you to change which country the purchase is simulated to occur in.

Default Localization Controls which localization will be used to display product details.

Time Rate For subscriptions, lets you specify an acceleration of time so subscriptions expire more quickly for testing. Unlike traditional device Sandbox testing, you have a range of acceleration options to choose from.

Enable Interrupted Purchases Simulates a user who runs into billing issues during a purchase.

Fail Transactions Allow you to produce failure transactions that may occur in StoreKit when dealing with subscription winback offers, so you can see how your application responds to different error scenarios.

Enable Ask To Buy Simulates the experience of purchasing on a device that has Ask to Buy enabled, as would happen if a parent was controlling purchases on a device.

Subscription Offers Keys Save Public Certificate For testing winback offers, a key needed to generate an offer.