Add a Product
Add a Roku platform product to the Nami system for purchase
Nami needs to be aware of any in-app purchase Product SKU configured in the Roku Developer Console so it can be used within your Nami-powered Paywall screens.
Create IAPs in Roku Developer Console
More information about configuring IAP items can be found in Roku's docs
Login to Roku Developer Console
Select Monetization > 'Products' from the side menu
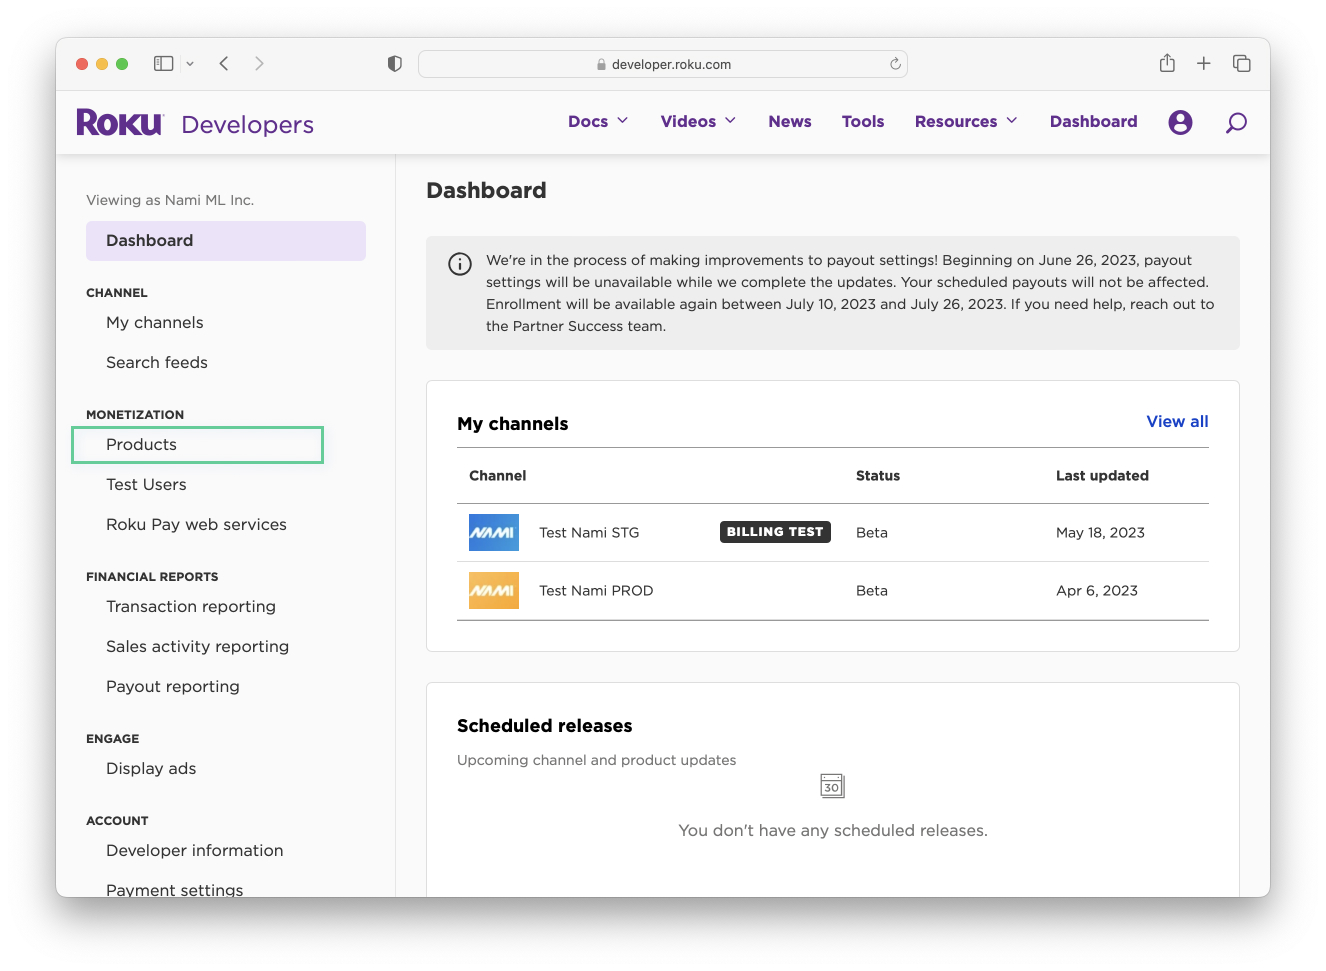
Click 'Add a new Product'
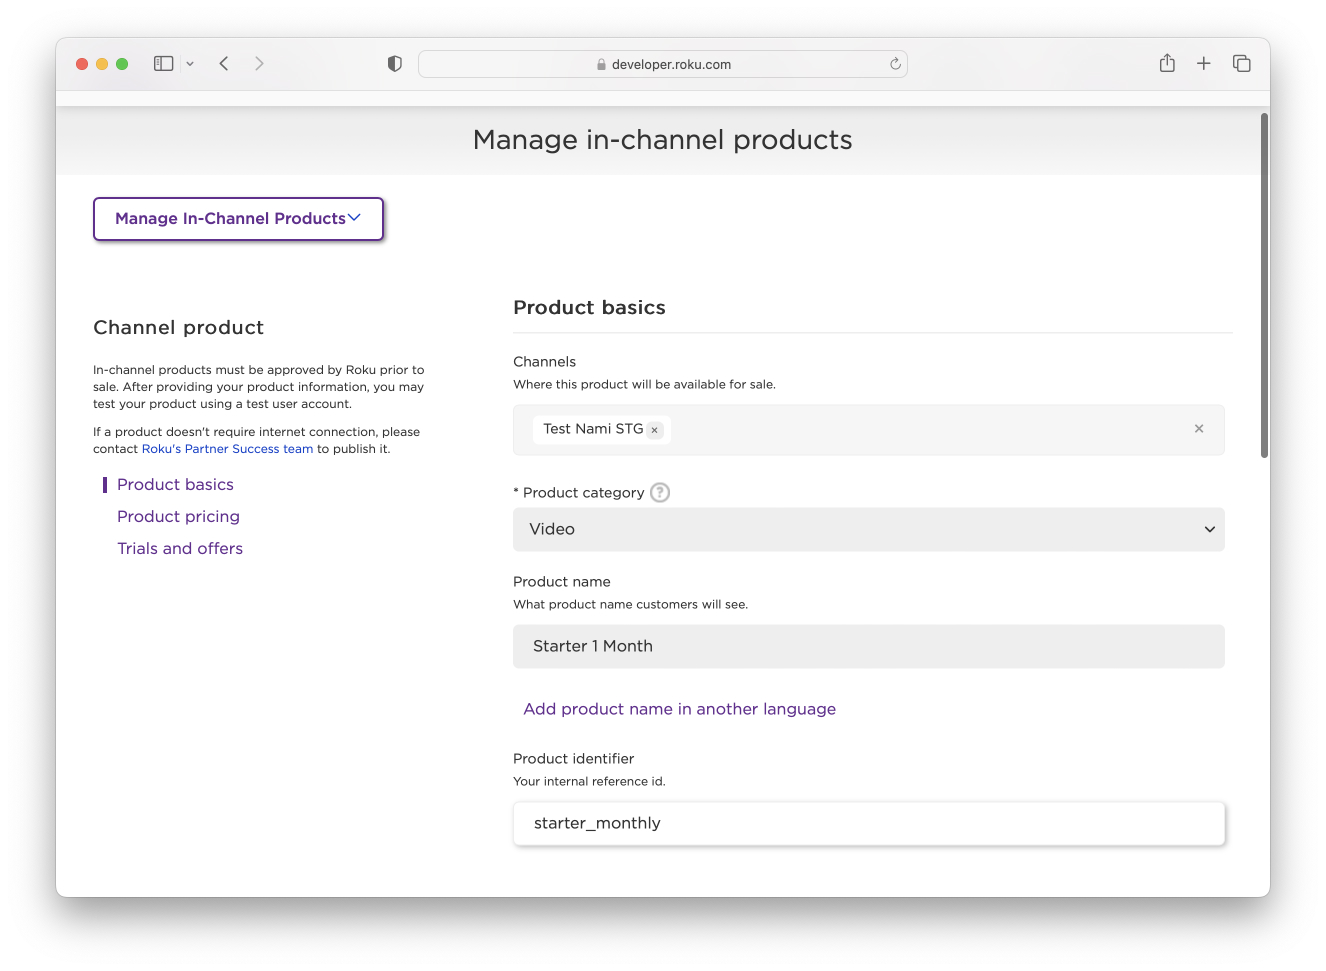
Pick the channels where the product should be available.
Select the product category
Give the product a name. Customers will see this name.
Provide an internal reference id.
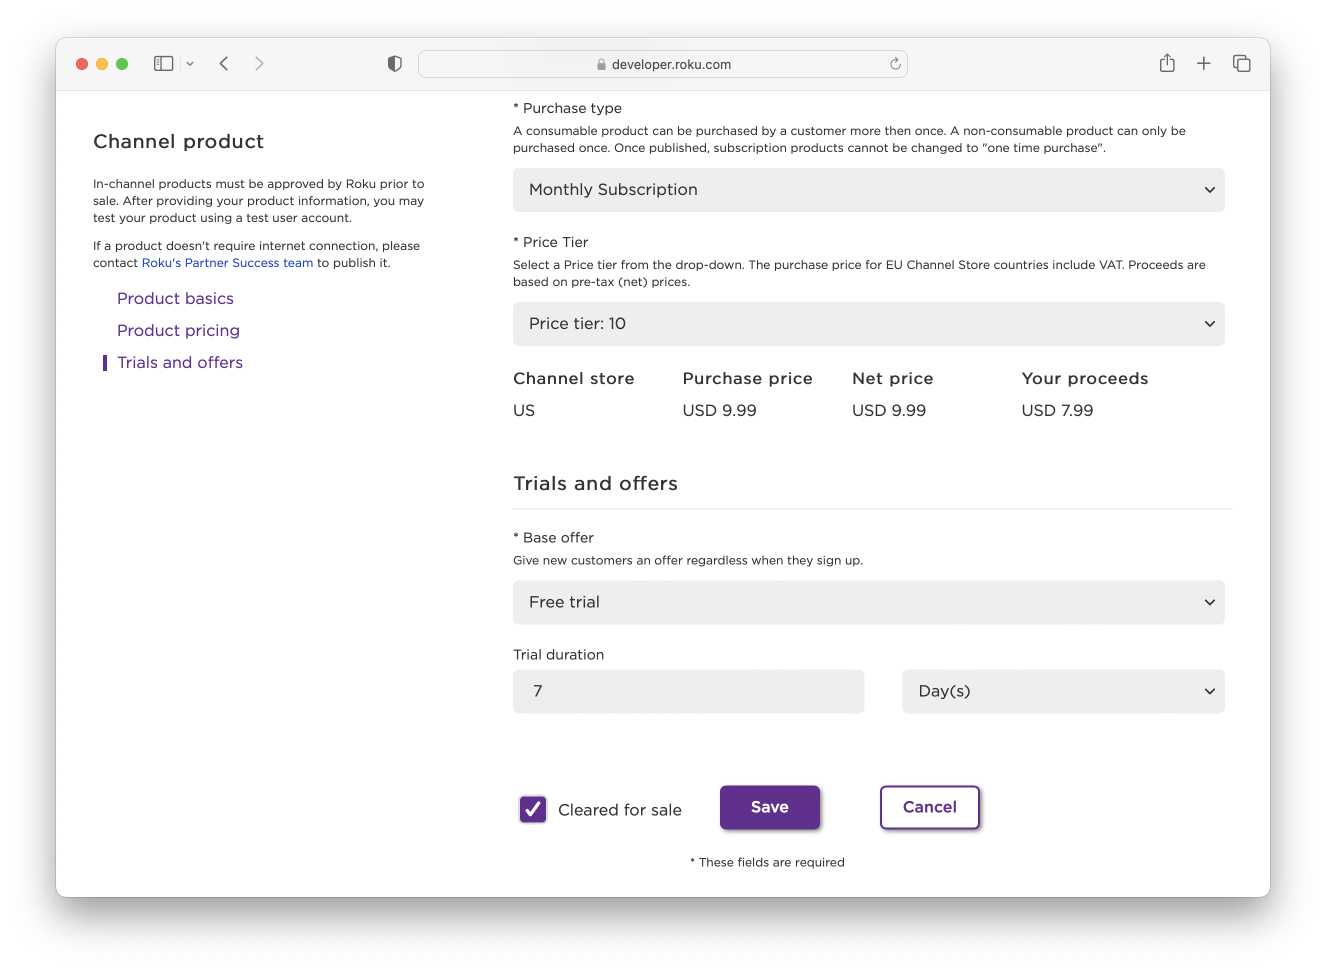
Select the purchase type. For subscriptions, choose either 'Monthly Subscription' or 'Yearly Subscription'.
Select your price tier
Add Offers if eligible.
Click 'Cleared for Sale'. This will let the Roku store access the product and will allow Nami to show it on your paywall.
Click Save
Repeat steps 4-12 for each product.
Add Subscription Product to Nami
Login to Roku Developer Console
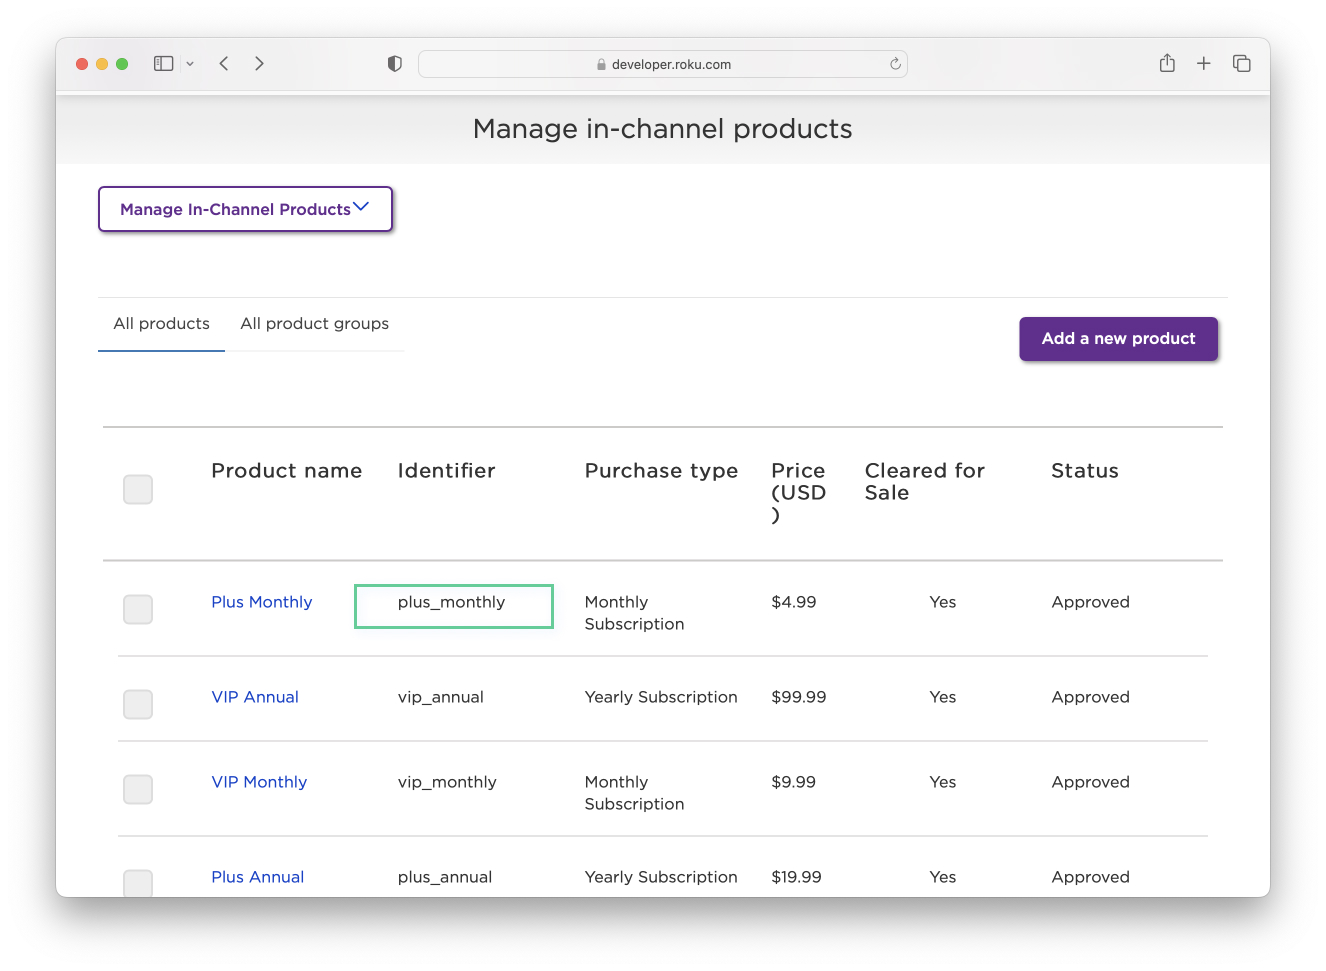
Select Monetization > 'Products' from the side menu. This will show you a list of all products and identifiers. You will need to copy the Identifier of the product you want to add to Nami.
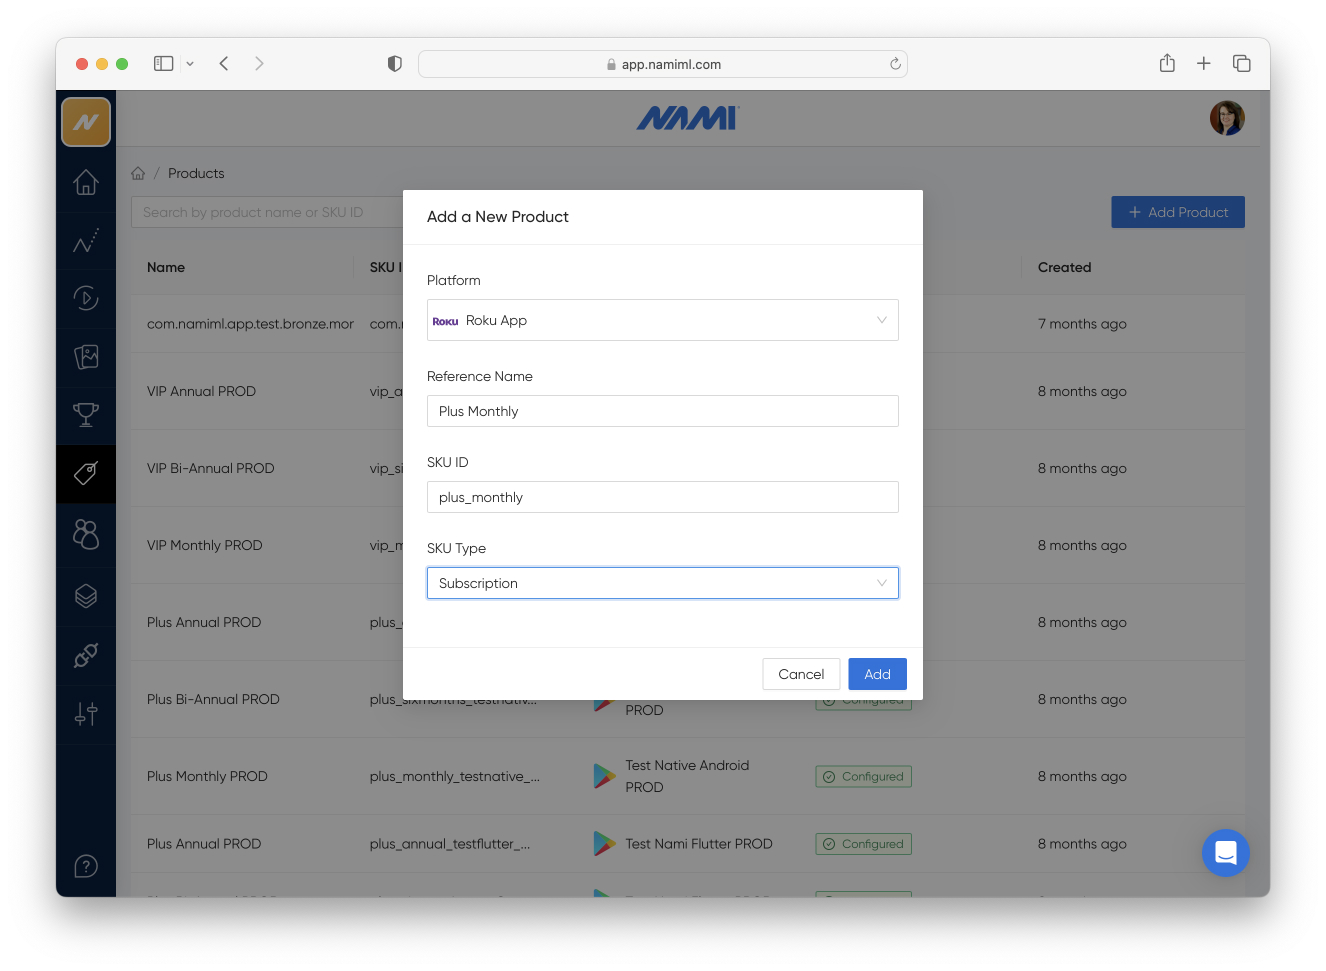
Back in the Nami Control Center > Products page, click "+ Add Product SKU"
Select your Roku platform from the Select Platform dropdown. If you have not created a Roku platform integration yet, see this guide.
For the Reference Name, give it a name that identifies the subscription and term. For example 'Test Nami Plus Monthly'.
From step 2, paste the Identifier into the SKU ID field.
Select "Subscription" from the SKU Type dropdown.
Click "Add" to add your subscription product to the Nami Control Center.
Repeat steps 3-8 for each subscription product in the Roku In-channel products list.
Add Products to Entitlement
Each product needs to be added to an entitlement. Entitlements grant access to content or features based on a purchase.
Last updated